Hydroponic Tomatoes from Seed to 10 kg (Every Stage Fixed)
Complete science-backed guide to growing hydroponic tomatoes. Covers best systems, stage-specific EC/pH charts, LED lighting, pollination, varieties, and troubleshooting — with university research data.
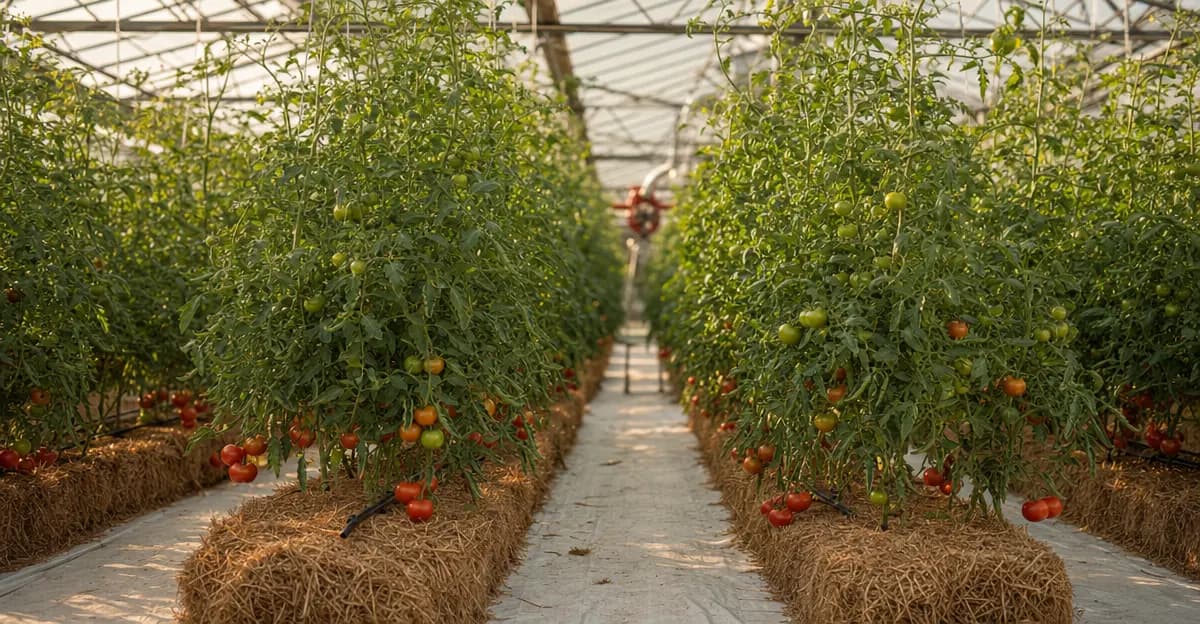
Key takeaway: Hydroponic tomatoes can yield 10 kg per plant (30 kg/m²) and ripen 30–50% faster than soil-grown tomatoes, while using significantly less water. A controlled comparison published in Scientia Horticulturae found that hydroponically grown tomatoes were more water-efficient and contained higher levels of lycopene and beta-carotene than soil-grown fruit. The key to success is stage-specific nutrient management — adjusting EC from 0.8 mS/cm at seedling stage up to 3.5 mS/cm during fruiting — which this guide covers in detail.
Why Grow Tomatoes Hydroponically?
Tomatoes (Solanum lycopersicum) are the most widely grown hydroponic crop worldwide, and for good reason. Research consistently shows measurable advantages over soil cultivation:
- Faster growth. Without the resistance of soil, roots access nutrients directly. Hydroponic tomatoes typically reach first harvest 60–80 days after transplanting, compared to 80–100+ days in soil.
- Higher practical yields. Well-managed hydroponic systems produce 10 kg per plant and up to 30 kg/m², compared to the 3–5 kg/plant typical of average backyard soil growing. Under controlled research conditions with equal inputs, per-plant yield can be similar — the practical advantage comes from optimized year-round production, precise nutrient control, and higher planting density.
- Better water efficiency. Recirculating hydroponic systems dramatically reduce water use. In a direct comparison, closed-loop drip systems achieved 54% higher water productivity than open drip systems (Nikolaou et al., 2021).
- Superior nutritional quality. Deep water culture produced lycopene and beta-carotene levels that were equal to or significantly higher than soil-grown tomatoes in a controlled trial (Verdoliva et al., 2021).
- Year-round production. With supplemental lighting and climate control, you can harvest tomatoes 12 months a year regardless of outdoor season.
- No soil-borne diseases. Eliminating soil removes Fusarium wilt, Verticillium, and root-knot nematodes from the equation entirely.
Best Hydroponic Systems for Tomatoes
Tomatoes are large, heavy-fruiting plants that demand strong root support, high nutrient concentrations, and substantial water uptake. Not every hydroponic system is equally suited to the task.
| System | Suitability | Best For | Setup Cost |
|---|---|---|---|
| Drip / Dutch bucket | Excellent | Commercial and large plants | $60–200 |
| DWC (Deep Water Culture) | Excellent | Beginners, single plants | $30–80 |
| NFT (Nutrient Film Technique) | Good | Multiple plants, experienced growers | $80–150 |
| Ebb & Flow | Good | High-density single-truss production | $80–200 |
| Aeroponics | Excellent | Maximum yield (advanced) | $200–500+ |
| Kratky (passive) | Not recommended | — | — |
Drip / Dutch Bucket — The Industry Standard
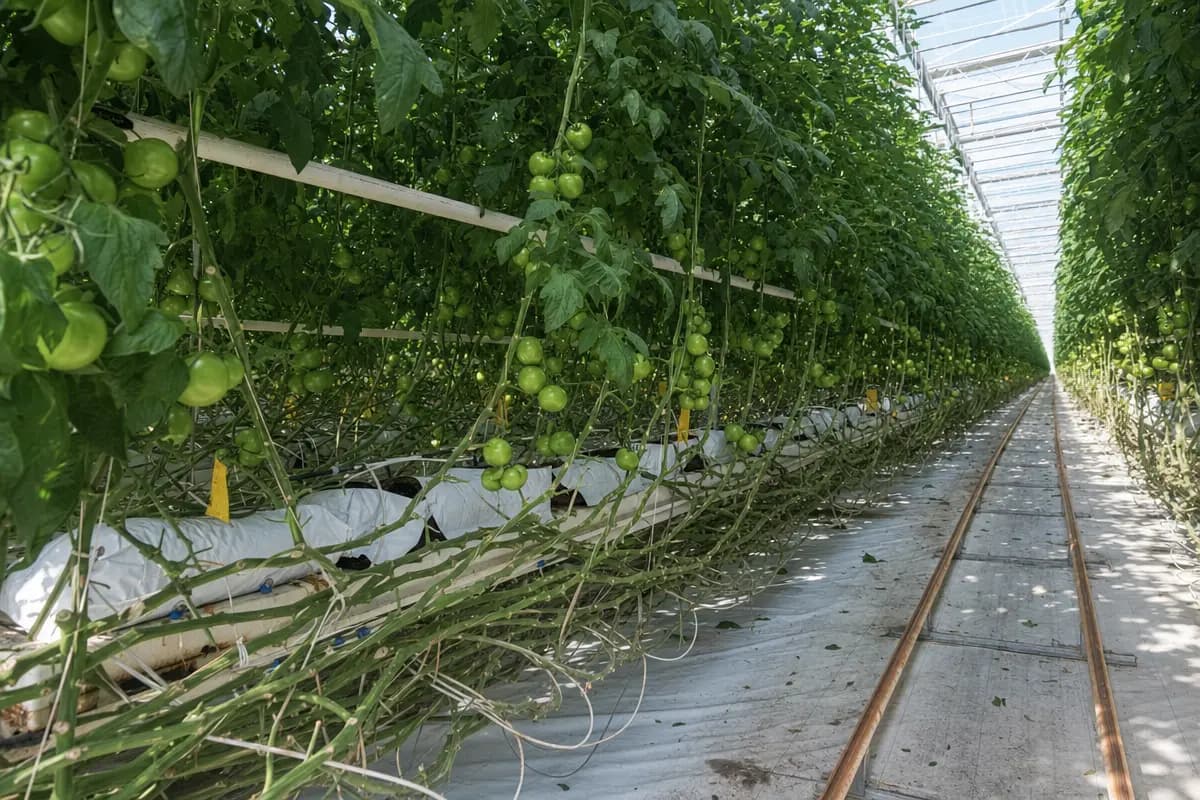
Most commercial hydroponic tomatoes worldwide are grown in drip systems on rockwool slabs or in Dutch buckets filled with perlite or clay pebbles. Nutrient solution is pumped through drip emitters to each plant, and excess drains back to the reservoir for recirculation.
Why drip dominates: it supports large, indeterminate vines that can grow 3+ meters tall, handles the high EC levels tomatoes need during fruiting, and scales from a single bucket to thousands of plants. A closed-loop drip system increases water productivity by up to 54% compared to open systems (Nikolaou et al., 2021).
For a DIY setup, fill 5-gallon Dutch buckets with 70% perlite and 30% vermiculite, run a drip line from a 20-gallon reservoir, and set a timer to irrigate 4–6 times daily for 3–5 minutes per cycle.
DWC — Best for Beginners
Deep Water Culture suspends plant roots directly in an oxygenated nutrient solution. A 2026 review in Discover Sustainability confirmed that DWC consistently supports superior vegetative growth, reproductive performance, and yield compared to soil cultivation. DWC is the simplest active system — a 5-gallon bucket, an air pump, an air stone, and a net pot is all you need to start.
The critical requirement is continuous aeration. Tomato roots submerged in stagnant solution develop root rot within days. Run air stones 24/7 and keep dissolved oxygen above 6 mg/L. External support structures (stakes or cages) are essential since the net pot alone won't support a fruiting vine.
NFT — For Multiple Plants
NFT is widely used in commercial tomato greenhouses. A thin film of nutrient solution flows continuously across roots in shallow channels. A 2024 bibliometric review of 774 NFT research papers confirmed tomatoes are one of the two primary crops studied in NFT systems, alongside lettuce (Palmitessa et al., 2024).
NFT requires precision: channels need a slope ratio of 1:30 to 1:40, and a backup pump is essential since roots dry out within minutes if flow stops. NFT works best when you're growing multiple plants in a row and want to maximize floor space.
Why Kratky Doesn't Work for Tomatoes
Passive Kratky hydroponics — where roots sit in a static, non-aerated solution — is not recommended for tomatoes. A single tomato plant requires 75–115 liters of water over its lifecycle, demanding an impractically large container. Without aeration, pH swings become severe, and nutrient imbalances cascade into blossom end rot and stunted fruiting.
Best Tomato Varieties for Hydroponics
Choosing the right variety matters more in hydroponics than in soil, because the system's vertical height constraints and pollination requirements shape which types thrive.
Indeterminate Cherry Tomatoes — Easiest to Start
Cherry tomatoes are the most forgiving hydroponic variety. They produce abundantly, tolerate minor nutrient fluctuations, and set fruit reliably with minimal pollination effort.
| Variety | Fruit Size | Flavor | Notes |
|---|---|---|---|
| Sungold | 15–20 g | Very sweet, tropical | Orange fruit, extremely productive |
| Sweet Million | 15–25 g | Sweet, balanced | High yield, disease resistant |
| Gardener's Delight | 20–30 g | Rich, classic | Reliable in all hydroponic systems |
Indeterminate Slicers — For Larger Fruit
Beefsteak and slicer varieties produce larger fruit (150–400 g) but require stronger structural support and higher EC levels during fruiting.
| Variety | Fruit Size | Notes |
|---|---|---|
| Trust | 180–220 g | Industry standard greenhouse variety |
| Geronimo | 200–250 g | Excellent flavor, disease resistant |
| Big Beef | 250–350 g | Heavy producer, strong vines |
Micro-Dwarf — For Small Spaces
If you're growing under a single grow light or in a small tent, micro-dwarf determinate varieties stay compact (20–30 cm tall) and don't require trellising.
| Variety | Height | Notes |
|---|---|---|
| Tiny Tim | 20–30 cm | Classic micro dwarf, 2–3 cm fruit |
| Micro Tom | 15–20 cm | Research variety, extremely compact |
| Red Robin | 20–25 cm | Good flavor for its size |
Nutrient Solution and EC/pH Management
This is where hydroponic tomatoes succeed or fail. Tomatoes are heavy feeders with nutrient demands that shift dramatically across growth stages. The Ohio State University Extension emphasizes that a phased nutrient solution based on developmental stages is essential for optimal growth (Kroggel and Kubota).
Stage-Specific EC and pH Targets
| Growth Stage | Duration | EC (mS/cm) | pH | Key Nutrient Focus |
|---|---|---|---|---|
| Seedling | ~28 days | 0.8–1.2 | 5.5–6.5 | Balanced; low concentration |
| Vegetative | ~25 days | 1.5–2.0 | 5.5–6.5 | Nitrogen for leaf growth |
| Flowering | ~21 days | 2.0–2.5 | 5.5–6.5 | Phosphorus and potassium increase |
| Fruiting | 45+ days | 2.5–3.5 | 5.5–6.5 | Maximum potassium; steady calcium |
These ranges come from validated research data. Start at the lower end of each range and increase gradually over the first week of each stage. Monitor EC daily — tomato nutrient uptake can swing significantly with temperature and light changes.
Macronutrient Targets (ppm)
| Nutrient | Seedling | Vegetative | Flowering | Fruiting |
|---|---|---|---|---|
| Nitrogen (N) | 70–113 | 100–140 | 144–180 | 150–210 |
| Phosphorus (P) | 31–62 | 31–62 | 31–62 | 31–62 |
| Potassium (K) | 117–200 | 150–235 | 300–400 | 300–400 |
| Calcium (Ca) | 109–160 | 150–200 | 150–200 | 150–250 |
| Magnesium (Mg) | 30–60 | 40–60 | 40–60 | 48–60 |
| Sulfur (S) | 50–64 | 50–64 | 50–64 | 50–64 |
Note the dramatic potassium increase from seedling (117–200 ppm) to fruiting (300–400 ppm). Potassium drives fruit development, sugar accumulation, and disease resistance. The recommended NPK ratio at full fruiting is approximately 190-47-350 with a Ca:Mg ratio of 3.5:1.
Micronutrient Requirements
Ensure your nutrient solution includes these essential micronutrients:
| Micronutrient | Target (ppm) |
|---|---|
| Iron (Fe) | 2.5 |
| Manganese (Mn) | 0.62 |
| Boron (B) | 0.44 |
| Zinc (Zn) | 0.3 |
| Copper (Cu) | 0.05 |
| Molybdenum (Mo) | 0.05 |
Iron is the most critical micronutrient for tomatoes. Use chelated iron (Fe-DTPA or Fe-EDDHA) to maintain availability across the 5.5–6.5 pH range. Iron deficiency manifests as interveinal chlorosis on young leaves — a common nutrient deficiency that's easily corrected when caught early.
Calcium and Blossom End Rot Prevention
Blossom end rot (BER) — the dark, sunken lesion on the bottom of the fruit — is the single most common problem in hydroponic tomatoes. Despite what many guides suggest, it's rarely caused by a calcium deficiency in the nutrient solution itself. The issue is calcium transport: calcium moves through the plant only via the transpiration stream and cannot be redistributed once deposited in tissue.
To prevent BER:
- Maintain calcium at 150–200 ppm in the nutrient solution at all times
- Keep EC stable. High EC reduces calcium absorption even when calcium levels are adequate
- Favor nitrate-nitrogen over ammonium-nitrogen — ammonium competes with calcium at root uptake sites
- Maintain humidity at 60–70%. Low humidity increases transpiration too rapidly; high humidity reduces it. Both extremes starve fruit tips of calcium
- Avoid potassium excess. Keep the K:Ca ratio below 1.75:1 during fruiting
Week-by-Week Nutrient Targets
The stage ranges above give you safe zones. This schedule provides specific optimal targets and transition protocols for each week, based on university extension research.
Weeks 1–4 (Seedling): Start at EC 0.8 with N 70 ppm. Increase EC by 0.1 mS/cm per week. By week 4, target EC 1.2 with N 90 ppm, P 47 ppm, K 144 ppm, Ca 150 ppm, Mg 48 ppm, S 55 ppm.
Weeks 5–8 (Vegetative): Transition EC from 1.2 to 2.0 over 3 days by making 25% concentration increases daily. Optimal targets: N 120 ppm, K 210 ppm, Ca 169 ppm. Potassium demand nearly doubles from the seedling stage — this is the first major nutrient shift.
Weeks 9–11 (Flowering): Shift to bloom formula. Potassium jumps from 210 to 342 ppm while nitrogen increases to 165 ppm. Maintain phosphorus steady at 47 ppm. Monitor pH closely during this transition — the shift in nutrient ratios can cause pH to drift upward by 0.3–0.5 units.
Weeks 12+ (Fruiting): Full fruiting formula with N 190 ppm, P 47 ppm, K 350 ppm, Ca 200 ppm, Mg 50 ppm, S 60 ppm. The NPK ratio at this stage is 190-47-350. Increase calcium to 200 ppm and maintain the Ca:Mg ratio at 3.5:1 to prevent blossom end rot.
Transition Protocol
When switching between stages, never jump EC by more than 0.5 mS/cm in a single day. A sudden EC spike causes osmotic stress that manifests as temporary wilting, leaf curl, and reduced nutrient uptake — symptoms that mimic both overwatering and underwatering.
The safest transition protocol:
- Mix the new stage formula at target concentration
- Day 1: Replace 25% of reservoir with new formula
- Day 2: Replace another 25%
- Day 3: Full reservoir change to new formula
- Monitor EC and pH for 48 hours before further adjustments
Stock Solution Mixing
For a two-part (A+B) system, keep calcium in Part A (with iron chelate and nitrogen) and sulfates and phosphates in Part B (with potassium and magnesium). Never mix concentrated calcium with concentrated sulfates — they precipitate as calcium sulfate and become unavailable to the plant.
Lighting for Indoor Hydroponic Tomatoes
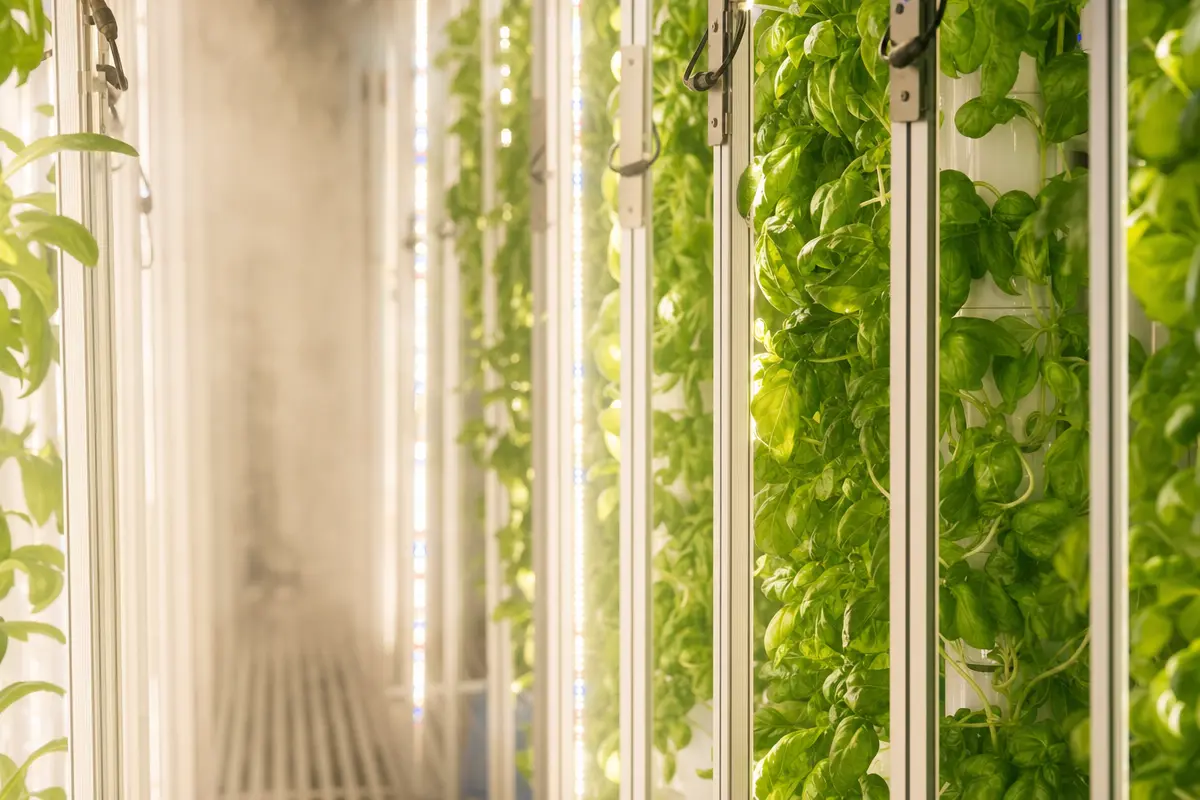
Tomatoes are high-light crops. Without sufficient light, plants become leggy, flowers drop, and fruit production drops to zero.
Light Targets
| Parameter | Seedling | Vegetative/Fruiting |
|---|---|---|
| DLI (mol/m²/day) | 13–17 | 22–30+ |
| PPFD (umol/m²/s) | 200–300 | 400–600 |
| Photoperiod | 16–18 hours | 14–16 hours |
A 2025 study in Horticulturae found that tomato seedlings in an indoor vertical farm reached 241% higher total biomass than greenhouse-grown seedlings when provided a DLI of 31.7 mol/m²/day (Choi et al., 2025). For mature fruiting plants, target at least 400 PPFD with a 14–16 hour photoperiod to reach a DLI of 22–30.
LED Spectrum
Full-spectrum LEDs with a ratio of approximately 60% red (600–700 nm), 25% green (500–600 nm), and 12–15% blue (400–500 nm) give the best results for tomatoes. Red light drives photosynthesis and fruit development; blue light prevents excessive stem elongation and strengthens vegetative growth. For a deeper dive on spectrum science, see our LED grow light spectrum guide.
Practical Setup
For a single plant in a 2×2 ft (60×60 cm) growing area, a 150–200W LED panel positioned 30–45 cm above the canopy delivers approximately 400–500 PPFD. Raise the light as the plant grows to maintain consistent distance. Use a timer — tomatoes need a dark period of at least 6–8 hours for proper hormone regulation and fruit development.
Pollination Indoors
Tomatoes are self-pollinating — each flower contains both male and female parts. Outdoors, wind and bees vibrate the flowers enough to release pollen from the anthers onto the stigma. Indoors, you need to replace that vibration.
Three Methods
- Shake the stems. Gently tap or shake the main stem for 5–10 seconds per plant, once daily when flowers are open. This is the simplest method and works well for small setups.
- Electric toothbrush / vibrating wand. Touch the back of an electric toothbrush to the flower truss for 2–3 seconds per cluster. The vibration frequency closely mimics bee wing buzz pollination. Research comparing methods found that mechanical vibration achieved a 79.5% fruit set rate per 100 flowers.
- Oscillating fan. Position a fan to gently move the stems. Less effective than direct vibration but provides continuous air movement that also strengthens stems and reduces fungal risk.
Pollinate during mid-morning when humidity is moderate (40–70%) and flowers are fully open. Avoid pollinating when humidity exceeds 70% — pollen becomes sticky and clumps rather than transferring.
Training and Support
Indeterminate tomato vines grow continuously and can reach 3+ meters in hydroponic systems. Without support and pruning, they become tangled, airflow drops, and disease pressure increases.
String Training (the Commercial Method)
Commercial greenhouse growers use the "lean and lower" system:
- Attach a length of garden twine to an overhead wire or hook at 2–2.5 meters height
- Clip the twine to the base of the plant stem with a tomato clip
- As the plant grows, wind the stem loosely around the twine (one wrap per 2–3 leaf nodes)
- When the top reaches the wire, lower the entire plant by releasing slack and laying the lower bare stem along a horizontal support wire
This system lets you manage a plant that grows 8–10 meters of stem in a space with only 2 meters of vertical clearance.
Pruning for Airflow and Yield
- Remove suckers (side shoots that emerge between the main stem and leaf branches) weekly. On indeterminate varieties, allow only 1–2 main stems. Each unpruned sucker diverts energy from fruit production.
- Remove lower leaves below the lowest ripening fruit truss. These leaves are shaded, contribute minimal photosynthesis, and trap humidity that encourages fungal growth.
- Top the plant (remove the growing tip) 4–6 weeks before your planned end date to redirect all remaining energy into ripening existing fruit.
Common Hydroponic Tomato Problems
Blossom End Rot
Dark, sunken lesion on the bottom of the fruit. See the calcium management section above for prevention. Remove affected fruit immediately — it won't recover.
Root Rot (Pythium)
Symptoms: brown, mushy roots with a foul smell; wilting despite adequate moisture. Caused by warm nutrient solution (above 25°C) and low dissolved oxygen.
Fix: Keep solution temperature below 24°C using a reservoir chiller or frozen water bottles. Maintain dissolved oxygen above 6 mg/L with adequate aeration. For active infections, inoculate with beneficial microbes (Trichoderma harzianum, Bacillus subtilis) as the primary biological treatment. As a secondary option, food-grade hydrogen peroxide (3%) at 3 mL/L can be used for emergency disinfection — consult local regulations for permitted crop treatments, wear gloves and eye protection, and flush the system before harvest. Install UV-C sterilization on recirculating systems to prevent reinfection.
Nutrient Burn
Symptoms: brown leaf tips, crispy margins, curling leaves. Occurs when EC exceeds 3.5–4.0 mS/cm or when salt builds up from inadequate flushing.
Fix: Flush the system with plain, pH-balanced water (2–3× the reservoir volume). Reduce nutrient concentration by 25–50% and increase gradually. Perform scheduled flushes every 2–3 weeks. See our nutrient burn guide for detailed troubleshooting.
Blossom Drop
Flowers dry and fall off without setting fruit. Common causes: daytime temperature above 34°C, nighttime temperature above 22°C or below 10°C, humidity outside the 40–70% range, or insufficient pollination.
Fix: Regulate temperature to 21–29°C day / 15–20°C night. Hand-pollinate daily during flowering. Switch to bloom-stage nutrients with higher P and K and reduced N.
Early Blight (Alternaria solani)
Brown spots with concentric "target" rings on lower leaves, progressing upward. Favored by temperatures of 24–29°C with high moisture.
Fix: Remove infected leaves immediately. Improve airflow through pruning. In hydroponic systems, early blight is less common than in soil but can still enter on transplants or through poor sanitation. Sterilize tools between plants.
Advanced Pest and Disease Management
The issues above are the most common. These less frequent problems can be equally devastating if not identified early.
Powdery Mildew (Oidium neolycopersici)
Light green to yellow blotches on upper leaf surfaces with white powdery sporulation. Thrives at 15–25°C with 60–90% relative humidity — conditions typical of many indoor grows.
Treatment: Potassium bicarbonate sprays reduced severity from 56% to 12% in controlled trials. Sulfur evaporators (above 18°C) are effective for greenhouse-scale prevention. UV-C light treatment (253.7 nm wavelength, applied twice weekly) eliminated the disease in research settings.
Prevention: Select resistant varieties (Geronimo F1, Granadero F1), enhance airflow through pruning and spacing, and keep greenhouse humidity below 85%.
Late Blight (Phytophthora infestans)
Irregular water-soaked spots that expand rapidly into purplish-black lesions. Under humid conditions, cottony white mold appears on leaf undersides. This oomycete can destroy an entire crop within days in cool, wet environments.
Treatment: Apply copper hydroxide (copper fungicide approved for organic use) preventively at 7–10 day intervals before symptoms appear, or use biological controls such as Bacillus amyloliquefaciens strain D747. Remove and destroy all infected material immediately — do not compost.
Prevention: Inspect all incoming transplants. Avoid overhead irrigation. Select resistant varieties: Mountain Magic, Iron Lady, Defiant.
Tomato Spotted Wilt Virus (TSWV)
Bronzing of youngest leaves with concentric ring spots. Yellow rings and sunken brown areas on fruit. Transmitted exclusively by thrips — once a plant is infected, there is no cure.
Treatment: Remove and destroy infected plants immediately. Deploy biological thrips control: Orius insidiosus (minute pirate bug) and Amblyseius swirskii (predatory mite).
Prevention: Plant varieties carrying the Sw-5 resistance gene. Install thrips-proof screening (<169 µm mesh) on all ventilation openings. Monitor with yellow sticky traps weekly.
Diagnostic Leaf Symptom Guide
| Symptom | Likely Cause | First Action |
|---|---|---|
| Yellow lower leaves, one-sided wilting | Fusarium wilt | Cut stem — check for brown vascular discoloration |
| White powder on upper leaf surface | Powdery mildew | Improve airflow; apply potassium bicarbonate |
| Fine webbing on leaf undersides | Spider mites | Release Phytoseiulus persimilis; raise humidity to 60–70% |
| Bronzing + concentric rings on young leaves | TSWV | Remove plant; inspect for thrips |
| Sticky honeydew + sooty mold | Whitefly or aphids | Release parasitoid wasps (Encarsia formosa or Aphidius colemani) |
| Olive-green velvety mold on leaf underside | Leaf mold (Passalora fulva) | Reduce humidity below 85%; improve ventilation |
Hydroponic vs. Soil-Grown Tomatoes
| Factor | Hydroponic (optimized indoor) | Soil-Grown (typical backyard) |
|---|---|---|
| Yield per plant | 8–10 kg | 3–5 kg |
| Days to first harvest | 60–80 | 80–100+ |
| Water usage | 20–50% less | Baseline |
| Nutritional quality | Equal or higher lycopene | Baseline |
| Flavor | Depends on EC management | Depends on soil quality |
| Startup cost | $50–300 | $10–30 |
| Year-round production | Yes (with lighting) | Seasonal |
| Soil disease risk | None | Fusarium, Verticillium, nematodes |
Importantly, the controlled comparison by Verdoliva et al. (2021) found that fruit yield was statistically similar between soil and hydroponic systems when both received equal inputs under identical conditions. The yield differences in the table above reflect real-world scenarios — optimized indoor hydroponics vs. typical outdoor soil gardening — where year-round production, precise nutrient delivery, and higher planting density give hydroponics a practical edge. Verdoliva et al. also found that hydroponic plants were significantly more water-efficient and DWC-grown tomatoes had higher beta-carotene and lycopene content.
A common misconception is that hydroponic tomatoes taste worse than soil-grown. Flavor is primarily determined by the balance of sugars and acids in the fruit, which is controlled by EC management. Raising EC slightly during the final 2 weeks of ripening (to 3.0–3.5 mS/cm) concentrates sugars and acids, improving flavor at the cost of slightly smaller fruit size. Many commercial greenhouse tomatoes taste bland because growers prioritize yield over flavor by keeping EC low.
Expected Yields and Timeline
| Growth Stage | Duration | What to Expect |
|---|---|---|
| Germination | 7–14 days | Seeds sprout at 20–30°C in rockwool or rapid rooter plugs |
| Seedling | ~28 days | First true leaves; EC 0.8–1.2 |
| Vegetative | ~25 days | Rapid stem and leaf growth; first flower trusses appear |
| Flowering | ~21 days | Flowers open; begin daily pollination |
| Fruiting | 45+ days | Fruit develops and ripens on the vine |
| Total to first harvest | ~130 days from seed | Faster from transplants (90–100 days) |
A well-managed indeterminate plant produces approximately 10 kg of fruit over its lifecycle, or 30 kg/m² in a multi-plant system. Cherry varieties often exceed these numbers per square meter due to higher plant density.
Commercial Scaling Guide
Moving from hobby to commercial hydroponic tomato production requires different system choices, economics, and operational discipline.
System Selection at Scale
| System | Yield (kg/m²) | Water Efficiency | Setup Cost (per m²) | Labor |
|---|---|---|---|---|
| Drip on rockwool | 25–35 | High (closed loop) | $15–25 | Low |
| Drip on coco coir | 30–40 | High | $12–20 | Low |
| NFT | 20–30 | Very high | $20–35 | Medium |
| DWC | 25–35 | Highest | $15–25 | Medium |
In a controlled substrate comparison, coco coir produced 26% higher fruit yield than rockwool (84.9 vs 67.5 t/hm²), with significantly greater potassium and sulfur uptake and higher photosynthetic rates. However, rockwool's consistency and inertness make it the global commercial standard. For new commercial operations, a 70:30 coco coir:perlite blend offers the best balance of yield and cost.
Yield Economics
At commercial density (2.5–3 plants/m²), well-managed drip systems produce 25–35 kg/m² per crop cycle. With supplemental lighting for year-round production, a 100 m² greenhouse can produce 2,500–3,500 kg annually.
Key cost factors:
- Growing media: Rockwool slabs ~$0.80/plant/cycle; coco coir ~$0.40/plant/cycle (reusable 2–3 cycles)
- Nutrients: $0.15–0.30/plant/cycle with recirculating systems
- Electricity: The dominant operational cost for indoor production — budget 40–60% of operating expenses for lighting and climate control
- Labor: Pruning, training, and harvesting require approximately 15 minutes per plant per week for indeterminate varieties
Grafting for Commercial Yield
Grafting specialty or heirloom varieties onto disease-resistant rootstocks (e.g., Solanum torvum, Maxifort) is standard commercial practice. Research demonstrates 36–47% yield increases with grafted plants compared to ungrafted, primarily from extended harvest seasons and improved disease resistance.
Harvest and Post-Harvest Protocol
Commercial growers harvest at the breaker stage (<10% color change) for shipping durability. Rapid cooling to 10°C post-harvest extends shelf life. Store at 7–13°C — temperatures below 7°C cause irreversible chilling injury that destroys flavor volatiles and produces mealy texture.
Getting Started: Your First Hydroponic Tomato
If this is your first hydroponic tomato, start simple:
- Choose DWC. One 5-gallon bucket, one air pump, one air stone, one net pot. Total cost: $30–50.
- Pick a cherry variety. Sungold or Sweet Million tolerate beginner mistakes and produce within 70 days of transplanting.
- Use a pre-mixed hydroponic nutrient. A two-part (A + B) tomato formula handles the stage transitions. Start at EC 1.0 and follow the label.
- Get a pH/EC meter. This is non-negotiable. Check daily. Adjust pH with phosphoric acid (down) or potassium hydroxide (up).
- Provide enough light. At minimum, a south-facing window plus a 100W LED. Ideally, 150–200W LED on a 14–16 hour timer.
- Pollinate daily. Shake the stem or use an electric toothbrush on the flower trusses.
Once you've harvested your first fruit, you'll understand why tomatoes are the world's most popular hydroponic crop. For precise nutrient management as you scale up, the Truleaf tomato page provides stage-specific parameters you can dial into any system.