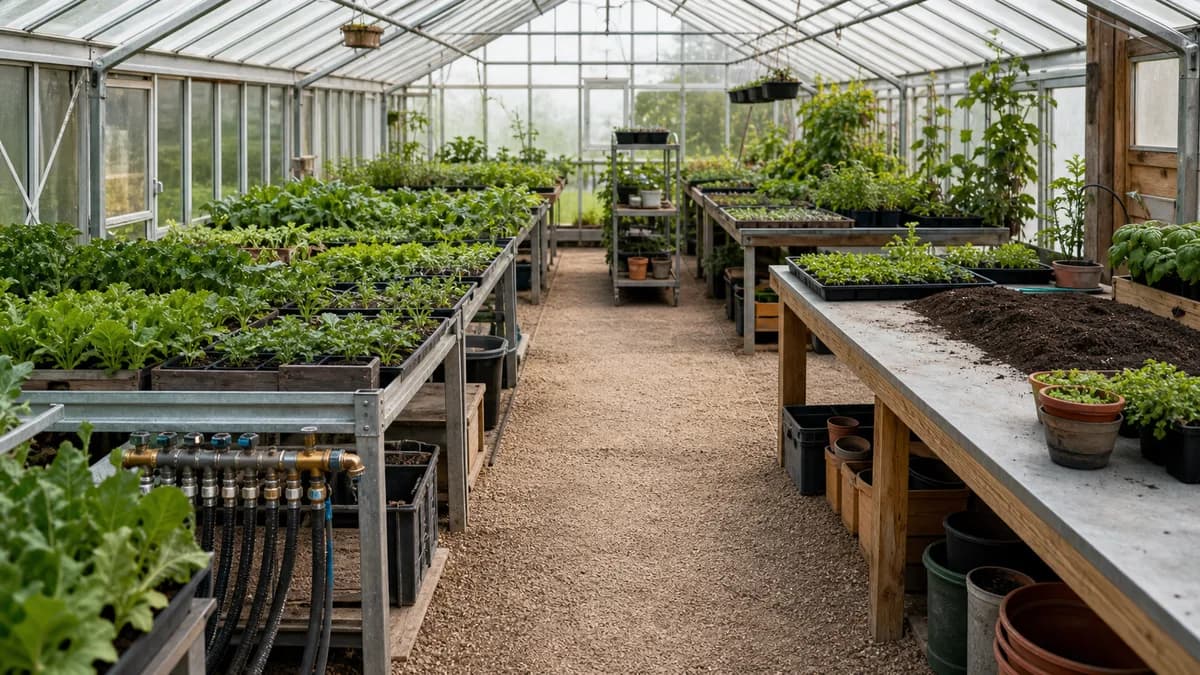
Greenhouse Layout Planning: Benches, Aisles, and Irrigation
Plan greenhouse benches, aisle widths, irrigation zones, work areas, and a small greenhouse floor plan around real reach and access needs.
Start greenhouse layout planning with doors, utilities, crop movement, and work zones. Then size benches for reach, set aisle widths for the people and equipment using them, and assign irrigation zones by crop demand and hydraulic limits. No single floor plan or growing-area percentage fits every greenhouse.
This guide helps you turn the clear inside dimensions of a greenhouse into a workable plan. It covers bench reach, aisle widths, irrigation zones, work and storage areas, crop movement, and small-house patterns. The dimensions are planning ranges, not structural or accessibility approval. Check the building, fire, electrical, drainage, and access rules that apply where you live.
The aim is a floor plan that works on a busy day at mature crop size. You should be able to bring materials in, tend the farthest plant, isolate irrigation groups, clean the floor, collect a harvest, and leave without moving half the greenhouse.
This guide owns the greenhouse-planning method. If you want a greenhouse planner or design workspace, see the Garden Architect, then verify its draft against real measurements and applicable requirements.
Table of contents
- Map doors, utilities, and crop movement
- Choose a greenhouse bench layout
- Set aisle widths for people and equipment
- Lay out irrigation and work zones
- Plan a small greenhouse floor plan
Map doors, utilities, and crop movement
A greenhouse plan should record fixed constraints first, trace movement through the structure, and add growing areas only after access and service space are protected. Greenhouse transport research treats people, machines, task time, and crop location as one system. Crop location also affects labor later, when plants need spacing or moving.
Collect the dimensions that will not move
Measure the clear internal length and width, not the advertised outside size. Then mark every fixed object that reduces usable space:
- doors and the direction in which they swing;
- posts, braces, low roof edges, and base rails;
- vents, fans, heaters, and areas they need to operate;
- drains, taps, electrical points, and existing pipe entries;
- steps, thresholds, and changes in floor level;
- permanent tanks, filters, manifolds, sinks, and storage.
Record each object as a rectangle with its own access area. A filter may occupy little floor space, for example, but it still needs room for removal and cleaning. Door swings and valve handles also need clear space. If a component cannot be serviced after the plants mature, it does not yet have a workable location.
Measure the tallest crop and the widest expected canopy at maturity. That second number often changes the plan more than the pot size. A tomato-row study measured nominal aisle-side spacing of 0.915 m (36 in), but fruit and foliage reduced the practical passage to about 0.715 m (28 in). Treat the mature canopy edge, rather than the bench frame, as the boundary of the path.
Draw the work before the benches
Write down the tasks that happen daily, weekly, and seasonally. Daily crop checks should sit in the easiest reach zone. Potting, washing, mixing, harvest packing, and waste handling need enough room for their tools and containers. Heavy or messy work usually belongs near the entrance, water point, and drain so materials travel a short distance through the crop.
Trace five routes on the plan:
- a person entering, checking every crop group, and leaving;
- the largest wheelbarrow, cart, or trolley entering and turning;
- seedlings or pots moving from the work area to their final position;
- harvested produce and plant waste moving out;
- a hose, pipe, or cable reaching its service points without crossing a doorway.
The main route should remain clear even when somebody is working at a bench. A staging rectangle near the entrance gives you somewhere to put a tray, bag, or cart without blocking that route. Greenhouse transport research supports planning these movements with the crop layout, rather than treating transport as a later detail.
Use a planning order that protects access
A practical planning sequence is:
- Draw the clear shell and all fixed constraints.
- Set the main route from the door to the far end or main work area.
- Reserve turning, staging, washing, storage, and service rectangles.
- Mark irrigation equipment and pipe corridors.
- Add benches or beds within reach limits.
- Draw mature crop outlines around the growing areas.
- Test cleaning, crop movement, emergency exit, and future changes.
This sequence combines greenhouse transport, bench, extension, and drip-system guidance. It also prevents a common planning error: filling the shell with regular bench rows and trying to fit every other task into the leftover strips.
Check space use without chasing a maximum
Use the bench-to-floor ratio as a diagnostic:
bench-to-floor ratio (%) = usable growing-bench area ÷ clear greenhouse floor area × 100
University of Georgia guidance describes roughly two-thirds bench area in a hobby greenhouse. A historical Cornell engineering manual illustrates 59% growing area for a longitudinal fixed layout, 69% for a peninsula layout, and 81% for a movable layout. Oklahoma State worked examples reached 45% and 49% with different fixed-bench dimensions, while its rolling-bench guidance says some systems can reach up to 90%. These figures describe different structures and assumptions, so they are comparisons rather than targets.
A fixed small greenhouse with 60% to 70% growing area can be entirely reasonable when the remaining area supports comfortable work and clear movement. A lower ratio may be the better plan if you need wheelchair access, a larger potting surface, crop staging, or room for a cart. A higher ratio may suit a commercial house with rolling benches and dedicated services. The ratio cannot tell you whether the far edge is reachable or a valve is trapped behind mature plants.
If you are still choosing how the plants will grow, compare the broad options in the hydroponic system planning guide. Layout should follow the chosen system's tanks, beds, containers, drainage, and maintenance needs. For artificial lighting, reserve safe mounting and service areas here, then hand fixture spacing, mounting height, and PPFD coverage to the grow light placement and coverage guide.
Turn the measurements into a draft: See the Garden Architect to map the shell, fixed objects, work areas, and editable growing zones.
Choose a greenhouse bench layout
Lay out greenhouse benches by marking doors, fixed services, the main travel path, and work areas first. Size each bench to the reach of the people who will use it, then preserve clear aisles at mature crop size. Add irrigation access last, and calculate growing-area percentage only after the layout works.
Choose a bench pattern for the work
The familiar parallel-row plan is easy to build and understand. It is not the only useful pattern. Each pattern changes reach, travel, service access, and floor use.
| Bench pattern | Where it fits | Main benefit | Main cost |
|---|---|---|---|
| Wall or longitudinal benches | Narrow hobby houses and simple crop rows | Direct routes and simple services | More permanent aisle area |
| Peninsula benches | Wider houses with a cross-route | More growing edge from a central route | Dead ends need turning and service planning |
| Movable or rolling benches | Higher-density production | One work aisle can serve several bench rows | Higher cost and flexible pipes or cables |
| Adjustable-spacing benches | Crops that widen with age | Space follows crop stage | Movement and safety need active management |
Historical engineering examples show the direction of the trade-off. The Cornell manual illustrated 59% growing area for fixed longitudinal benches, 69% for peninsulas, and 81% for movable benches. A strawberry research system fitted nine movable beds where six conventional beds had fitted. Another strawberry study increased planting density from 8 to 12 plants/m² with movable beds. The larger yield result in that second study also involved supplemental light, carbon dioxide, and temperature control, so it cannot be credited to bench movement alone.
Movable systems also change the service plan. Irrigation lines, drains, sensors, and electrical connections must move safely or remain clear of moving parts. A dense plan that saves floor area but catches hoses under wheels will not save work.
Set width from reach, not a catalog number
Greenhouse extension references allow one-sided benches up to about 0.9 m (3 ft) wide and center benches served from both sides up to about 1.8 m (6 ft). Treat those figures as upper limits. The correct width depends on the user's reach, the height of the plant, the task, and whether a heavy tray has to be lifted from the back edge. The ASAE document behind some of these values has been withdrawn and is available as historical guidance, not current code.
Ergonomic research gives a more cautious view of frequent work. Ohgama and colleagues found a comfortable reach of 0.20 to 0.40 m (8 to 16 in) for able-bodied older adults during a two-handed transplanting task. Their combined desirable range for able-bodied and frail older adults was 0.10 to 0.40 m (4 to 16 in). Industrial reach studies also show meaningful differences by posture and body size. Sengupta and Das reported average female reach 13.5% shorter than the corresponding male reach, while Yang and Abdel-Malek separated maximum reach from more comfortable reach zones.
That evidence does not make every bench 0.40 m deep. It supports keeping frequent, precise, or heavy tasks close to an edge. A wider bench can hold low plants that are handled less often, provided you can reach every point without leaning on crops, wet surfaces, or unstable frames.
Mock up one bay before building
Use tape, boxes, or a spare table to test the proposed bench:
- Mark the front and back edge at the planned height.
- Add an empty pot at the farthest position.
- Replace it with the expected mature plant outline.
- Try watering, pruning, lifting a tray, and checking the plant from the intended aisle.
- Repeat the test for the shortest-reach user and anyone who will work seated.
- Widen the crop outline to include leaves or fruit that may enter the aisle.
If your hip, shoulder, or forearm has to rest on the bench to reach the back, narrow the bench or serve it from both sides. If the mature plant blocks sight of the container or emitter, move inspection points closer to the aisle.
Plan for crop size to change
Young plants can make a fixed layout look wasteful, while mature plants can erase its paths. Ota and colleagues tested a tomato system that changed bench spacing among 0.6, 1.0, and 1.4 m as the crop developed, with several benches moving to form a work path. Those dimensions belong to that system, but the planning lesson applies more broadly: show both the starting footprint and the mature footprint.
You do not need powered movable benches to use the idea. Leave one flexible bay for seedling tables, removable shelves, or a seasonal work surface. Put crops with similar movement and irrigation needs together. Keep the route to valves, flush ends, and drains open in every configuration.
Compare bench arrangements before you build: See the Garden Architect to test fixed, peninsula, and flexible zones against your greenhouse dimensions.
Set aisle widths for people and equipment
Greenhouse aisle width should match the traffic using it and stay clear after crops mature. A standing-only service aisle may be much narrower than a route for visitors, carts, wheelchairs, or equipment. Label every aisle by purpose, then test its narrowest point with the actual person or object that must pass.
Planning ranges by use
The evidence does not support one best aisle width. Use the following ranges as a starting point, then check local rules and the real equipment.
| Aisle use | Source-backed planning range | How to interpret it |
|---|---|---|
| Standing-only service aisle | 0.46 to 0.50 m (18 to 20 in) | Tight production access, not an accessible route |
| Visitor passage in a small house | 0.61 to 0.76 m (24 to 30 in) | A visitor-passage range, not a universal equipment clearance |
| Wheelbarrow or cart route | Measure the actual outside handle width, then add steering and turning clearance | Test the loaded equipment at the narrowest point and at every turn |
| Commercial main aisle | 0.9 to 1.5 m (3 to 5 ft) | Historical engineering range for larger traffic flows |
| Movable work aisle | 0.45 to 0.60 m (18 to 24 in) | Temporary aisle created between rolling benches |
| Accessible route where U.S. ADA Standards apply | generally 0.915 m (36 in) clear | Limited reductions have conditions; turns may need more space |
The small-house visitor range comes from University of Georgia guidance, while the commercial and movable figures come from historical engineering references. The same Georgia source says wheelbarrows need more width than a standing-only aisle but does not assign a universal wheelbarrow range. Measure the actual outside handle width and allow for the loaded equipment to steer and turn. The U.S. Access Board states that an accessible walking surface is generally at least 0.915 m (36 in) clear. A limited reduction to 0.815 m (32 in) is allowed only under the conditions in section 403.5.1, and some turns require more room. Whether those standards apply depends on the facility, its use, and the jurisdiction. Check the current rules for your project.
Do not use a robot research aisle as a human minimum. A strawberry system used a usual 0.5 m aisle and expanded it to about 1 m for a harvesting robot. A separate multi-layer research frame used a 0.5 m operating aisle to retain manual working room while limiting lost area. Both are useful examples of task-based sizing, not general safety standards.
Measure clear width where the aisle is smallest
Drawn aisle width is the distance between bench frames. Clear aisle width is the usable gap after plants, trellis clips, irrigation lines, hose reels, door hardware, and stored materials enter the space. The tomato-row study that lost about 0.20 m (8 in) to foliage and fruit shows why the distinction matters.
Measure or estimate these encroachments on both sides:
- mature leaves, fruit, and trained stems;
- pots or trays that overhang the bench;
- handles, valves, and hose loops;
- bracing at knee, shoulder, or head height;
- temporary harvest crates and waste containers;
- open doors, cabinet fronts, and removable filter housings.
Keep the main route free of routine storage. If a bag of growing medium has no marked home, it often ends up in the widest path. A small storage rectangle on the plan is more useful than hoping the aisle will remain empty.
Test movement, passing, and turning
Start with the largest moving item, not the average person. Measure the outside width of the wheelbarrow, trolley, mobility device, or harvest cart. Include hands on the handles. Add the room needed to steer rather than drawing a straight slot exactly as wide as the object.
Tape the proposed aisle on the floor. Place boxes at mature canopy width and carry out the task that matters most. Can you turn at the end? Can another person step aside? Can a seated user approach the bench? Can the cart enter while the greenhouse door is fully open? Can you remove a filter or tank lid without putting it in the path?
One route may need to do more than the others. In a small greenhouse, protecting one generous central path and keeping side access tighter can work better than giving every aisle the same width. In a public, teaching, or commercial facility, traffic, emergency egress, and accessibility duties may require a different plan. A floor-plan guide cannot replace a local code review.
Test paths at mature crop size: See the Garden Architect to compare aisle widths, turning areas, and canopy outlines before fixing the benches.
Lay out irrigation and work zones
A greenhouse irrigation zone layout should group plants that can share a watering schedule and hydraulic circuit. Put crop demand, container size, growing medium, emitter flow, pressure, pipe length, and pump capacity ahead of visual symmetry. Keep every valve, filter, regulator, sensor, and flush point reachable after the crop fills its space.
Define a zone by what it must control
An irrigation zone is a group operated by one valve, schedule, or sensor threshold. Two adjacent benches may need separate zones if one holds young plants in small containers and the other holds fruiting plants in large containers. Two distant benches may share a zone only if the pipe design can deliver water evenly and both groups need the same timing.
Group plants by:
- crop and cultivar water use;
- growth stage and fruit load;
- container size and growing medium;
- sun, shade, and heat exposure within the house;
- emitter type and flow rate;
- required irrigation frequency and run time;
- pressure loss, lateral length, and available pump flow.
The research supports demand-based grouping. Van Iersel, Dove, and Burnett found that mapping spatial moisture variation can guide irrigation design and sensor placement. Ropokis and colleagues measured 15% to 20% differences in cumulative water use among greenhouse sweet-pepper cultivar treatments. The size of the difference belongs to that crop and study, but it shows why a crop name alone may not define one demand group.
Draw control points before lateral lines
Place the water entry, backflow protection where required, filter, pressure regulator, main shutoff, zone valves, and any injector or storage tank. Give each item a service rectangle. Then draw a mainline or header route that can reach the zones without crossing doorways or creating trip points.
Within each zone, mark:
- the valve or control point;
- the header and lateral direction;
- the first and last emitter;
- the sensor location, if used;
- the flush end and drainage path;
- the place where flow or pressure can be checked.
Pipe orientation can affect performance. Fan and colleagues found that lateral layout significantly affected water uniformity and had an even stronger effect on fertilizer uniformity in their tested drip-fertigation arrangement. Their transverse layout performed better than the longitudinal layout in that test, but the result is not a universal rule. Check the hydraulics for the actual greenhouse, pipe sizes, slopes, pressures, and emitters.
Size zones from flow and the watering window
The number of benches does not determine the number of zones. Use emitter flow, emitter count, available pump flow, pressure limits, and the time available to complete all irrigation cycles. The British Columbia greenhouse drip manual uses a 90% or better distribution-uniformity goal and provides a worked example based on pump capacity and cycle time. It is a historical commercial manual, so recalculate every input for the current equipment and crop.
For each proposed zone, record:
| Input | What to measure |
|---|---|
| Plant group | Crop, cultivar, stage, and container |
| Emitters | Type, rated flow, and count |
| Zone demand | Total emitter flow |
| Supply | Available flow and operating pressure |
| Schedule | Needed run time and number of cycles |
| Pipe route | Mainline, header, lateral length, and elevation change |
| Control | Valve, sensor, and manual override |
| Service | Filter, regulator, test point, and flush access |
If the total zone demand exceeds the reliable supply, split the zone or change the design. If two groups need different run times, separate them even if the pump could run both. If the cycle window cannot cover all zones during the desired period, revise the zone size, emitter selection, storage, or schedule with qualified irrigation guidance.
Use sensors to represent the zone
A sensor should sit where its reading represents the group it controls, not where mounting is easiest. Container size, root water uptake, and local heat can change what the sensor sees. In a strawberry greenhouse case study, local sensor control held moisture closer to a 50% to 55% target and used more than 50% fewer valve-operating hours than the conventional comparison under constant flow. That result describes valve run time in one facility, not a guaranteed water-saving percentage.
Plan a manual check point even when control is automatic. You still need access to the crop, emitter, sensor, valve, and flush end when readings look wrong. Keep control hardware away from standing water and follow the electrical and plumbing rules for the site.
Hydroponic systems may replace some drip components with channels, reservoirs, pumps, or passive containers. Choose the system before finalizing service zones. The hydroponic system planning guide owns that comparison; this greenhouse guide does not rank systems or provide method-specific setup instructions.
Map equipment and editable demand groups: See the Garden Architect to place valves, service areas, pipe corridors, and irrigation zones on the floor plan.
Plan a small greenhouse floor plan
A small greenhouse floor plan works best when one clear main path connects the door, work area, and growing space. Choose the shell width by adding reachable bench depths and the required path width. Keep daily tools near the entrance, show mature crop outlines, and reserve a small staging area before filling spare corners.
Choose width from the inside out
University of Georgia and Oklahoma State guidance both recommend adding bench and walkway widths before settling the greenhouse width. That order matters because greenhouse product names often describe outside dimensions. Frames, braces, and wall slopes reduce the clear interior.
Start with the route that must fit. Add a bench on one side if the remaining strip is reachable and useful. Add a second wall bench only if the main path still serves its intended traffic. A center bench needs access from both sides, so it belongs in a wider shell with two usable aisles.
The following patterns are dimensioned examples, not universal plans:
| Pattern | Example clear internal width | Width breakdown | Approximate growing-area ratio |
|---|---|---|---|
| Two narrow wall benches | 2.1 m (6 ft 11 in) | 0.6 m bench + 0.9 m main path + 0.6 m bench | 57% |
| Two deeper wall benches | 2.4 m (7 ft 10 in) | 0.75 m bench + 0.9 m main path + 0.75 m bench | 63% |
| Wall and center benches | 3.9 m (12 ft 10 in) | 0.6 m wall bench + 0.75 m path + 1.2 m center bench + 0.75 m path + 0.6 m wall bench | 62% |
The ratios assume that the benches run the same clear length and that no end area is removed for work, turning, utilities, or storage. A real plan will often have a lower ratio once those rectangles are included. Recalculate from the displayed bench areas and the clear floor area rather than copying the percentage.
The 0.6 to 0.75 m (24 to 30 in) wall benches in these examples sit within the 0.61 to 0.91 m (2 to 3 ft) one-sided range in the extension guidance. The 1.2 m (4 ft) center bench is narrower than the cited 1.83 m (6 ft) two-sided upper limit. The 0.9 m (35 in) paths are planning examples for private use, not a claim of accessibility compliance. Where an accessible route is required, use the current applicable standard and provide the turning and passing space it requires.
Protect the entrance and daily work zone
Put the tasks with the most material movement near the entrance. Even a compact work surface needs more than its footprint. You also need standing or seated access, a place for a tray, and room to open any storage below it. Set the size from your tools and tasks.
Keep a water point, daily tools, labels, and harvest containers near the work surface when the services allow it. Store bulk materials where they can enter without crossing delicate crops. Put wet work near a suitable drain, but do not assume that every greenhouse floor or site can accept wash water. Follow local drainage and wastewater requirements.
Aligning the door and main aisle reduces turns for carts and long materials. If alignment is impossible, draw the full door swing and test the corner with the largest object. Protect a staging rectangle beside the route. Even a tray-sized space can stop supplies from blocking the doorway.
Plan for the collection to grow
University of Georgia guidance suggests allowing 25% to 50% more capacity and notes that greenhouse length is generally easier to extend than width. The practical lesson is to settle the width around access and reach, then keep one end or side from becoming the permanent home of equipment that would block a future extension. Any expansion still needs structural, foundation, drainage, electrical, and permitting review.
Show one future-change edge and one flexible rectangle on the plan. The flexible area might hold seedlings in spring, a removable work table in summer, or harvested trays in autumn. It can absorb change without narrowing the main path.
Before buying benches or installing pipe, check the plan against this list:
- Clear inside dimensions are recorded.
- Door swings, posts, braces, vents, drains, and utilities are shown.
- The widest user or object can travel and turn.
- Aisle width is measured at mature canopy size.
- Every bench point is reachable for the task performed there.
- Work, storage, staging, and waste areas have defined rectangles.
- Irrigation groups have separate controls where their schedules differ.
- Filters, valves, sensors, and flush ends remain serviceable.
- Bench-to-floor ratio is calculated after access is protected.
- One area or edge can accept future change.
- Local structure, access, fire, electrical, and drainage rules have been checked.
Build the dimensioned version: See the Garden Architect to turn your measurements into an editable greenhouse plan. If you already have the inputs ready, start the guided setup as a secondary next step.
Source notes
Last verified:
Put the guide into practice
Use Truleaf Garden Architect to map the space, equipment, and growing system before you build.