Hydroponic Alfalfa Microgreens: A Growing and Handling Guide
Learn how to grow hydroponic alfalfa as cut microgreens with a research-backed tray method, cautious nutrient guidance, and preventive food-safety steps.
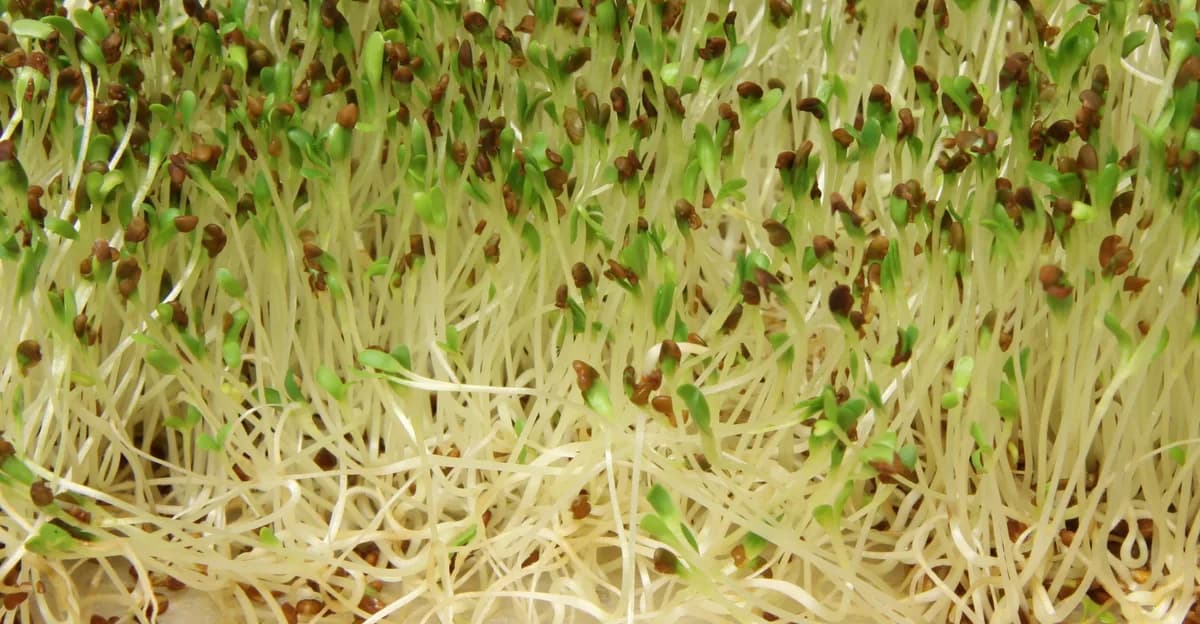
Key point: Grow edible hydroponic alfalfa as a cut microgreen crop. Sow it on a clean, shallow medium, keep it moist through germination, move it into light and root-zone feeding after emergence, then cut the stems above the medium when the cotyledons are open and the first true leaves begin to appear.
That crop is different from an alfalfa sprout. EU law defines sprouts as seeds germinated in water or another medium, harvested before true leaves develop, and eaten whole with the seed. Microgreens grow longer and are cut, leaving the seed, roots, and growing medium behind.
The distinction affects both your setup and your food-safety plan. A June 2026 joint ECDC-EFSA assessment linked 109 confirmed cases of Salmonella Bovismorbificans across 10 EU/EEA countries and the United Kingdom to alfalfa sprouted seeds. Spain reported one confirmed case, involving a Finnish tourist visiting the country. The assessed product was sprouted seed, not microgreens. Hydroponic microgreens still need clean seed, safe water, clean equipment, and hygienic harvesting because contamination can enter through the seed, water, nutrient solution, medium, tools, or handling.
First decide which alfalfa crop you want
The phrase “hydroponic alfalfa” can describe three different crops. They should not share one growing guide.
| Crop | What you harvest | Typical use | Does this guide cover it? |
|---|---|---|---|
| Sprouts | Seed, root, stem, and undeveloped leaves, eaten whole before true leaves | Raw or cooked food | No |
| Microgreens | Cut stems and leaves after cotyledons open and early true leaves appear | Fresh garnish, salad, or sandwich green | Yes |
| Fodder | Seedling biomass produced for animal feed | Livestock feed | No |
Choose microgreens if you want a small edible crop for people. Do not use a microgreen tray plan to calculate livestock feed, dry matter, or farm economics. Those questions need animal-nutrition and forage evidence.
What the direct alfalfa research shows
One peer-reviewed experiment grew Medicago sativa cv. Kangaroo as microgreens in floating hydroponics. Researchers sowed the seed in perlite-filled containers, kept the medium moist and covered during germination, then moved the containers onto a complete nutrient solution after emergence. The alfalfa emerged three days after sowing and was cut with scissors 20 days after sowing.
The study establishes that floating hydroponics with perlite can produce alfalfa microgreens. It does not identify the best tray, density, nutrient strength, pH, light level, or harvest day for every cultivar. There was one alfalfa production treatment, not a comparison of alternative growing recipes.
Use the published method as a starting reference, then keep your first home trial small.
Equipment for one trial tray
You need:
- alfalfa seed sold for edible microgreen production
- a shallow, food-suitable tray with drainage or a removable inner tray
- a clean holding tray or shallow hydroponic basin
- clean perlite, a clean fiber mat, or another medium made for microgreens
- drinking-quality water
- a complete hydroponic nutrient with seedling or microgreen directions
- an opaque lid or clean cover for germination
- a light source after emergence
- clean scissors or a clean sharp knife for harvest
Before buying equipment, use the Garden Architect to map the tray, basin, and light placement in your growing area.
The direct alfalfa trial used perlite in floating containers. Broader microgreen guidance also supports clean fiber mats and other well-drained media, but it does not show that one medium is best for alfalfa.
Step 1: Clean before seed touches the tray
Wash your hands. Remove visible residue from the tray, holding basin, and tools, then sanitize food-contact surfaces with a product labeled for that use. Follow its contact time and rinse directions.
Start with drinking-quality water. A clear reservoir can still carry microbes, so appearance and smell are not water tests. Penn State's food-safety guidance treats water used for soaking, rinsing, irrigation, and washing as a possible contamination route.
Keep pets, potting-soil bags, dirty harvest containers, and used growing medium away from the clean production area. Preventing contamination before germination matters more than trying to wash a questionable crop after harvest.
Build a sanitation and crop-check checklist
A written checklist makes it easier to repeat the same clean setup and decide what to do when a tray looks questionable. Keep one record for each seed lot and growing batch. Passing these checks does not show that a raw crop is free of pathogens.
Before sowing, record the seed supplier and lot code, water source, medium, tray ID, cleaning product, and cleaning date. Check the sanitizer label for the correct dilution, contact time, and rinse instructions. Clean visible residue before sanitizing because these are separate steps in food-contact hygiene.
Use three decision points for each batch:
| Decision point | Continue only when | Stop or discard when |
|---|---|---|
| Before sowing | The tray, basin, cover, and tools are visibly clean; the medium is new and clean; the water is drinking quality; and the seed lot is identifiable. | The water source is uncertain, the equipment still has residue, the medium was already used, or the seed cannot be traced to a lot. |
| During growth | Moisture is even, drainage is open, the crop smells fresh, and you can inspect the canopy and root zone. | A section becomes slimy, develops a sour or musty smell, or shows spreading discolored growth. Isolate the tray while you decide whether to discard it. |
| At harvest | The edible canopy has stayed separate from dirty tools, used medium, pets, and splash from questionable water; the cutting tool and container are clean. | You know or reasonably suspect that unsafe water, a dirty surface, or contaminated handling contacted the edible crop. Do not mix it with a clean batch. |
Do not add a home seed-disinfection recipe unless a qualified source has validated the product, concentration, contact time, and seed type. The retained sources support prevention across seed, water, equipment, medium, and handling. They do not establish a home treatment that makes contaminated alfalfa seed safe.
After a discarded batch, record what you observed and where it began. Remove the crop, clean away plant material, then sanitize the reusable equipment according to its label. A short record helps you spot repeated failures tied to one tray position, seed lot, water source, or handling step.
Step 2: Fill and wet the growing tray
Add a shallow, even layer of clean medium. Wet it with drinking-quality water, then let excess water drain. The surface should be evenly moist without pools around the seed.
For a floating setup, keep the inner tray out of the nutrient basin during initial germination. In the direct alfalfa experiment, researchers watered the perlite manually during germination and moved the containers into the floating nutrient system only after emergence.
Step 3: Sow a small, even test batch
Spread the seed in one layer as evenly as possible. Crowding may raise total tray weight while producing weaker individual shoots. Microgreen research treats useful density as species-specific, so copying another crop's tray weight is unreliable.
The alfalfa experiment used 300 g of seed per square metre, equal to 45 g in its 0.5 × 0.3 m container. Treat that figure as one cultivar's research density, not a universal target. For your first run, record the tray area and seed weight. Adjust the next tray only after you see whether emergence, airflow, and harvest quality were even.
Cover the seed with a thin layer of the same clean medium if your chosen system requires it. The direct trial covered alfalfa seed with perlite and used opaque film until germination was complete.
Run a controlled two-tray density trial
Sowing density is a useful variable to test because it affects both total tray yield and the size or quality of individual shoots. The best density changes by species, so the alfalfa trial's 300 g/m² is a documented condition rather than a target you must copy.
Complete one baseline tray first. Then run two matching trays with the same seed lot, medium, water, cover, growing position, and planned harvest stage. Use the baseline seed weight in one tray, then make the second tray modestly lighter or heavier. Change only the seed weight. If you also change the medium or feeding method, you will not know which change produced the result.
Calculate the tray area and density before sowing:
- Measure the inside growing length and width in metres.
- Multiply length by width to get area in square metres.
- Divide the seed weight in grams by the tray area to get grams per square metre.
The research container measured 0.5 × 0.3 m, so its area was 0.15 m². At the study density of 300 g/m², that container received 45 g of seed. Use that calculation to check your record, not to claim that a different tray needs the same density.
Record the same observations for both trays:
| Observation | What to record | Why it helps |
|---|---|---|
| Sowing | Tray area, seed weight, calculated density, and seed lot | Confirms that density is the intended difference. |
| Emergence | First emergence date, date most seedlings lift the cover, and bare or crowded patches | Shows whether one treatment established more evenly. |
| Canopy | Upright or leaning stems, wet patches, airflow obstruction, and visible seed coats | Captures quality differences that total weight can hide. |
| Harvest | Crop stage, harvest date, cut fresh weight, and any area you discarded | Lets you compare usable harvest rather than total biomass alone. |
Compare the trays only after both reach the same planned crop stage. A heavier tray may produce more total weight while giving you weaker individual shoots, and one small run cannot establish a universal optimum. Repeat the better-performing density once before treating it as your baseline. If the result changes on the repeat, check whether moisture, tray position, or emergence differed.
Step 4: Germinate moist, not flooded
Place the covered tray in a clean area. Check that the medium stays evenly moist, but do not leave seed submerged in stagnant water. The direct experiment used 20°C (68°F) and 60% relative humidity during germination and observed alfalfa emergence after three days.
Those figures describe one successful protocol. They are not proven optima. Use emergence as the decision point: once emergence is even and most seedlings have lifted the cover, remove it and provide light.
If a tray smells sour or musty, turns slimy, or develops spreading discolored growth, isolate and discard it. Do not taste a questionable tray.
Step 5: Add light and feed from the root zone
After emergence, give the seedlings enough light to green and remain upright. Microgreen studies use a wide range of light settings, and the retained alfalfa trial used a greenhouse rather than a controlled indoor lighting comparison. That evidence does not support one exact intensity, fixture height, or day length for alfalfa.
Water or feed from below where your tray allows it. Root-zone watering reduces direct water contact with the edible stems and leaves. Remove standing excess that leaves the seed surface continuously saturated.
The direct alfalfa trial used a complete leafy-crop nutrient solution after emergence. Its prepared solution was EC 2.3 mS/cm at pH 5.5-5.8, while the recorded solution later averaged EC 2.38 mS/cm and pH 6.43. Those are study conditions, not tested optima. The experiment did not compare lower EC, water-only growth, or alternative pH ranges.
For a home trial, follow your complete nutrient product's microgreen or seedling direction. Do not copy the paper's salt recipe or assume that a higher EC will improve growth. General microgreen evidence suggests that short crops often need little fertilizer and that response changes by species and rate.
Note: These sources answer different questions. The alfalfa experiment shows that one complete nutrient solution can produce the crop, while the broader review shows that fertilizer response varies with species and rate. Neither source establishes a universal EC target for alfalfa microgreens.
Step 6: Keep the canopy dry enough to inspect
Check the tray daily. Look for even moisture, upright stems, open cotyledons, clean water, and unobstructed drainage. Provide gentle air exchange without aiming a strong fan directly at delicate stems.
When one patch grows poorly, inspect moisture and seed density before changing the whole nutrient solution. A wet corner, dry edge, or clump of seed can create a local problem that a reservoir adjustment will not solve.
Clean spills and remove plant debris promptly. If water, tools, or hands may have contaminated the edible canopy, discard the affected crop rather than depending on a rinse to make it safe.
Step 7: Harvest by growth stage
Harvest after the cotyledons have opened and the first true leaves are beginning to appear. Cut above the medium so the roots, seed coats, and growing medium stay in the tray.
The direct alfalfa trial harvested at 20 days after sowing. That is a useful research reference, not a deadline. Cultivar, temperature, light, density, and system management can change the pace. Do not classify the crop by a seven-day label alone: if you harvest it whole with the seed before true leaves develop, it fits the sprout definition rather than the cut microgreen covered here.
Wash your hands and use clean scissors. Place the cut greens in a clean container and refrigerate promptly if you are not using them at once. Do not mix a questionable patch into a clean harvest.
A first-crop record that improves the next tray
After signing in, record five things in your Plant Diary:
- Tray area and seed weight
- Sowing and emergence dates
- Water source and nutrient product direction used
- The day the cover came off
- Harvest date, fresh weight, and any wet, bare, or weak patches
Keep the setup unchanged for the first tray unless safety or crop health requires intervention. On the second tray, change one variable, such as seed weight or the timing of root-zone feeding. A small comparison gives you evidence from the same room, seed lot, and equipment.
Use an event-based batch record
Build the crop schedule around visible events instead of forcing every tray onto a fixed daily plan. The direct alfalfa trial observed emergence after three days and harvested after 20 days, but those were results from one cultivar and method. Your record should show when your crop reaches each decision point.
| Crop event | Record | Decision before moving on |
|---|---|---|
| Batch prepared | Batch ID, seed lot, tray area, seed weight, medium, water source, and sanitation check | Sow only after the clean setup and crop identity are recorded. |
| Seed sown | Date, calculated density, moisture condition, and cover used | Confirm that seed is spread evenly and the medium is moist without standing water. |
| Emergence begins | Date and uneven, bare, or wet areas | Keep checking moisture distribution. Do not remove the cover based on the calendar alone. |
| Cover removed | Date, crop stage, and reason for removal | Add light when emergence is even and seedlings have lifted the cover. |
| Root-zone feeding begins | Date, nutrient product direction, water volume, and any pH or EC reading you choose to track | Treat the reading as a batch observation. Do not turn the paper's solution values into an alfalfa optimum. |
| Pre-harvest check | Cotyledon and early true-leaf stage, canopy condition, smell, standing water, and any isolated area | Complete the process check before harvesting above the medium. This check does not establish that the crop is pathogen-free. |
| Harvest completed | Date, fresh weight, discarded weight, cutting tool, container, and refrigeration time if stored | Keep clean harvest separate from rejected material and record the usable result. |
Add an exception line whenever you intervene. Write down what you saw, what you changed, and when you checked again. For example, if one corner stays wet, record the tray position and drainage correction before changing the nutrient mix. If the whole tray changes after a new mix, record the product direction, water volume, and reading before replacing it.
Use the completed batch to set one goal for the next crop. Pick the weakest part of the result, such as uneven emergence, a wet edge, or a low usable harvest. Change one related variable and keep the rest of the method stable. Safety decisions remain exceptions: isolate or discard a questionable crop even when that interrupts the comparison.
After two or three batches, compare records from the same seed lot and setup. Your own emergence and harvest intervals will then be more useful for planning than the 20-day research endpoint alone. Keep the study result as context and your repeated batch results as the working baseline.
Troubleshooting hydroponic alfalfa microgreens
| What you see | Check first | Best next action |
|---|---|---|
| Uneven emergence | Uneven moisture or clumped seed | Level the tray, correct moisture distribution, and sow the next batch more evenly |
| Long, pale, leaning stems | Cover left on after emergence or weak light | Remove the cover after emergence and improve usable light without overheating the canopy |
| Wet stems or standing water | Poor drainage or too much top watering | Drain excess and move irrigation to the root zone where possible |
| Repeated weak patches in one position | Tray slope, blocked drainage, or uneven contact with solution | Compare that position with a healthy area before changing nutrients |
| Sour smell, slime, or spreading discolored growth | Contamination or prolonged saturation | Isolate and discard the tray; clean and sanitize the equipment before restarting |
Frequently asked questions
Are alfalfa sprouts and alfalfa microgreens the same?
No. Under the EU definition, sprouts are harvested before true leaves and eaten whole with the seed. Microgreens grow further and are cut above the medium, leaving the roots and seed behind.
Did the 2026 European outbreak involve alfalfa microgreens?
The joint ECDC-EFSA assessment identified alfalfa sprouted seeds as the primary vehicle. It did not identify alfalfa microgreens as the outbreak product. The event still reinforces the need for traceable seed, safe water, clean equipment, and preventive hygiene in any raw young-green crop.
What pH and EC should I use?
The retained evidence does not establish universal alfalfa-microgreen targets. One floating-hydroponics experiment prepared a complete solution at pH 5.5-5.8 and EC 2.3 mS/cm, but it did not compare alternative settings. Follow a complete product's microgreen or seedling direction and record the result rather than treating one paper's recipe as an optimum.
How long do hydroponic alfalfa microgreens take?
One direct trial harvested alfalfa microgreens 20 days after sowing. Use the crop stage as your main guide: open cotyledons, early true leaves, and stems tall enough to cut cleanly above the medium.
Can I grow alfalfa microgreens with plain water?
General microgreen guidance says very short crops may need little or no fertilizer, but the direct alfalfa trial used complete nutrient solution after emergence. The evidence does not settle one best method. After you complete one baseline crop, compare plain water with dilute feeding in two small trays from the same seed lot and keep every other condition the same.
Can I reuse the growing medium?
For a home food crop, starting with clean new medium is the easier safety choice. Used medium holds roots and organic debris and would need a validated cleaning process before another edible crop. Clean and sanitize reusable trays between batches.
A sensible first crop is a modest one: a clean tray, traceable edible seed, drinking-quality water, even sowing, root-zone irrigation, and a cut harvest at the microgreen stage. That gives you a repeatable baseline without confusing the crop with whole alfalfa sprouts.