How to Grow Garlic, 4 Ways: The Complete Guide
Learn how to grow garlic from a single clove with this research-backed guide to all four methods: garden beds, containers, greenhouses, and hydroponics. Covers clove selection, vernalization (the cold requirement), day length, scapes, and how to harvest, cure, and store your crop. Grounded in 11 peer-reviewed studies and 8 university extensions.
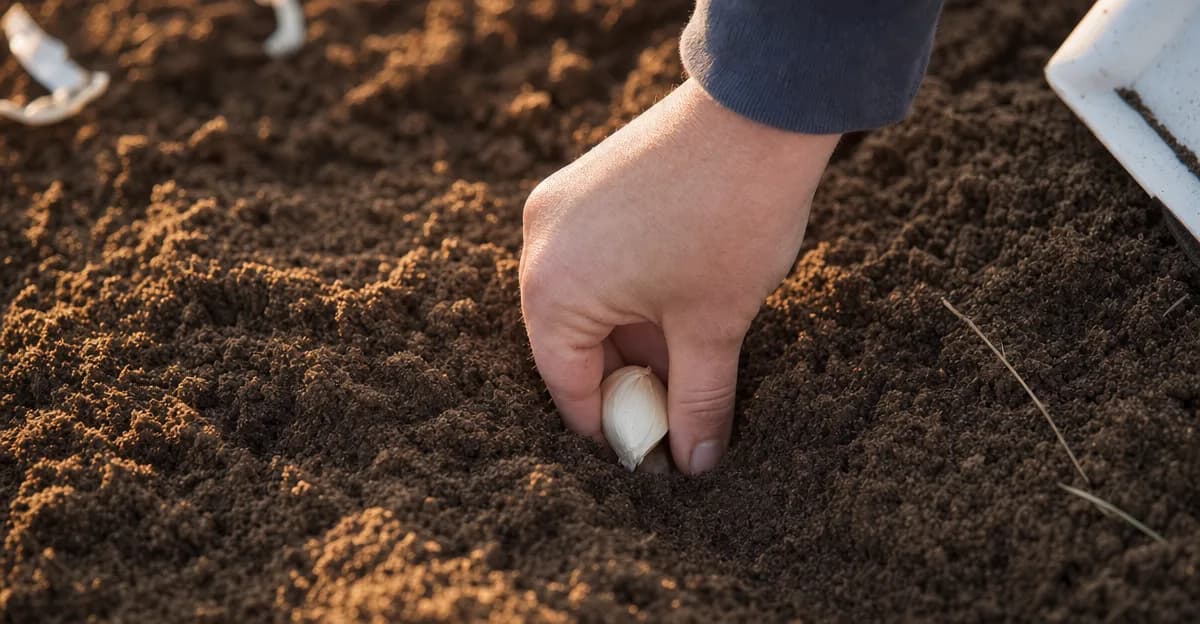
Garlic (Allium sativum) is one of the most rewarding crops a grower can plant: a single bulb splits into a dozen or more cloves, and each clove — pushed into the ground pointed-end up in autumn — becomes a full new bulb by the following summer. There are no seeds to start, no seedlings to harden off. You plant a piece of food and harvest more of it.
What garlic asks in return is patience and a cold winter. It is a long-season crop that spends months underground before it ever puts on visible growth, and it carries a genuine biological requirement most vegetables do not: a stretch of cold that tells the plant to form a proper, segmented bulb. This guide covers the whole cycle across four growing environments — garden beds, containers, greenhouses, and soilless (hydroponic) systems — with every recommendation tied to peer-reviewed research and university extension guidance, and honest notes wherever the evidence is thinner than the internet usually admits.
Why Garlic Is Worth Growing
Home-grown garlic gives you access to hundreds of varieties that never reach a supermarket, which stocks only a handful of storage-friendly softneck types. Growing your own opens up hardneck garlics prized for complex, sometimes spicy flavor, plus a mid-season bonus crop most shoppers never see: garlic scapes, the curling flower stalks of hardneck types.
The growing environment does more than decide whether garlic survives — it shapes the crop itself. A controlled comparison of Taşköprü garlic found that greenhouse versus open-field production significantly changed bulb yield, bioactive compound content, and mineral profile. In other words, how and where you grow garlic measurably changes what ends up on your plate, not just how much of it there is.
Understanding Garlic Before You Plant
Hardneck vs. softneck
Two broad groups cover most garlic you will grow:
- Hardneck garlic produces a central woody flower stalk (the scape), tends toward fewer but larger cloves, offers bolder flavors, and is generally more cold-hardy — the better choice for cold-winter regions.
- Softneck garlic has no rigid central stalk (it is the type sold braided), packs in more, smaller cloves, stores longer, and is better suited to mild-winter zones.
The practical rule: cold-winter growers lean hardneck; mild-winter growers (roughly USDA zones 8–10) lean softneck, which needs less cold to bulb properly.
The annual cycle
Garlic runs on a distinctive fall-to-summer calendar. In temperate regions it is planted in autumn, roots through the cold months, rests over deep winter, then races through leaf and bulb growth in spring before a mid-to-late-summer harvest.
| Stage | Typical timing (temperate) | What's happening |
|---|---|---|
| Planting | Oct–Nov | Cloves planted; roots establish before hard frost |
| Winter dormancy / vernalization | Dec–Feb | Cold exposure programs the plant to form a segmented bulb |
| Vegetative growth | Mar–May | Leaves expand; each leaf maps to a future bulb wrapper |
| Scaping (hardneck) | Jun | Flower stalks emerge and are removed |
| Bulbing | May–Jun | Warm temperatures and lengthening days drive bulb swelling |
| Harvest | late Jun–Aug | Lifted when lower leaves brown but several stay green |
| Curing & storage | +2–4 weeks | Bulbs dried down for keeping |
One expectation to set early: each clove you plant yields exactly one new bulb, and garlic does not regrow after harvest — you replant cloves each season.
Planting From a Clove
Garlic is propagated vegetatively. You break a bulb into individual cloves and plant the cloves — each is a genetic copy of the parent, so a variety you love can be carried forward indefinitely.
Choosing and sizing cloves
Plant the largest, healthiest outer cloves and set the small inner ones aside for the kitchen. This is not folklore: a peer-reviewed study of clove size found that larger planting cloves produce larger bulbs and higher marketable yield, because a bigger clove carries more stored energy for establishment. Extension guidance agrees — separate bulbs into cloves only just before planting, and discard any that are soft, moldy, or damaged.
Depth and spacing
Plant each clove pointed end up, root plate down, about 5–7 cm (2–3 in) deep, with 10–15 cm (4–6 in) between cloves and roughly 30 cm between rows. In colder regions, plant toward the deeper end of that range and add a layer of straw mulch after the ground cools to buffer freeze-thaw cycles.
Other propagation routes (and their limits)
- Bulbils — the tiny topsets that form in a hardneck's flower head — will grow into garlic, but it takes two to three seasons to size them up into full bulbs, so they are mainly a way to bulk up clean seed stock rather than to produce a crop quickly.
- True seed is rare. Most cultivated garlic is functionally sterile; research into garlic's flowering biology traces this to the loss of the transcriptional machinery that would normally restore fertility. For the home grower, cloves are the only practical starting point.
The Cold Requirement: Vernalization and Day Length
This is the part of garlic biology that trips up new growers, and where peer-reviewed research adds nuance most guides skip.
Why garlic needs cold
Garlic must experience a period of cold — vernalization — before it will differentiate a normal, multi-clove bulb. Field-practical guidance from extensions and growers puts the requirement at roughly 4–8 weeks near 0–10 °C, and the peer-reviewed literature brackets that same window: bolting-type garlic is reported to need about 30–40 days at 0–4 °C, or 50–60 days at 10 °C (measured from the four-leaf stage) to satisfy the cold requirement. Skip it, and the plant tends to produce a "round" — a single undivided bulb — instead of a proper segmented head.
Controlled research pins down the mechanism. Ben Michael and colleagues showed that a long cold exposure (their study used 12 weeks at 4 °C) activates the shift from vegetative to reproductive growth, and that non-vernalized plants did not make that transition at all; the cold treatment altered the expression of roughly 14,000 genes. The 4–8 week practical window and the 12-week research condition are not in conflict — the shorter range is a working minimum for the field, while longer, colder exposure drives a more complete response. Treat 4–8 weeks as your floor, not a target to just barely clear.
Day length finishes the job
Cold is the primary trigger, but it is not the whole story. Once a plant is vernalized, warm temperatures and long days drive bolting and bulbing. Two independent peer-reviewed studies found that higher temperatures (around 20–25 °C) combined with photoperiods longer than about 13 hours significantly enhanced bolting, bulbing, and clove formation, shortening the growth period and increasing bulb weight compared with cool, short-day conditions.
The sequence matters, and it is the detail most guides miss: cold comes first as the master switch, and day length acts later in the cascade, governing stem elongation and bulb swelling. This is exactly why fall planting works so well — cloves bank their cold over winter, then meet the lengthening days of spring already primed to bulb.
Pre-Chilling Cloves for Indoor and Warm-Climate Growers
If you garden where winters are too mild to reliably vernalize garlic — or you are growing indoors or in a soilless system with no natural cold season — you can supply the cold yourself before planting.
The experimental basis for this is clove chilling: Wu and colleagues demonstrated that cold-treating cloves before planting advances bolting and shifts yield, standing in for the natural winter cue. In practice, growers hold cloves at roughly 2–5 °C for 4–8 weeks — a home refrigerator's produce drawer works — before planting them out.
Keep in mind the trade-offs the research implies:
- Longer, colder chilling gives a more complete response but the field-practical 4–8 week window is usually enough for a segmented bulb.
- Pre-chilled, warm-climate, or indoor garlic still faces a long cycle and high light demand, so plan for months, not weeks.
- Softneck types generally need less cold than hardnecks, which makes them the safer choice for mild-winter and pre-chill approaches.
Four Ways to Grow Garlic
Method 1: Garden beds (the primary, best-documented method)
Open-ground garden beds are where garlic is most reliably grown and best studied. Choose a sunny, well-drained site with loose, fertile soil, plant in autumn on the depth and spacing above, and mulch after the ground cools.
- Advantages: natural soil biology, unlimited root run, and a large body of regional extension guidance to draw on.
- Limitations: you are at the mercy of your climate's winter and soil drainage, and soilborne allium diseases (white rot, basal rot) can persist in beds where alliums have grown before.
Method 2: Containers
Garlic grows well in containers, which is a good fit for growers with poor soil, limited space, or a balcony. Use a pot at least 20 cm (8 in) deep with excellent drainage, fill with a free-draining mix, and follow the same depth and spacing as in-ground planting.
- Advantages: full control over soil and drainage, portability, and isolation from disease-carrying garden soil.
- Limitations: containers dry out and swing in temperature faster than open ground, so they need closer attention to watering and winter protection.
Method 3: Greenhouse and high tunnel
A greenhouse or high tunnel extends the season and shelters the crop, and it measurably changes the result: the greenhouse-versus-field comparison cited earlier found significant differences in yield, bioactive compounds, and mineral content between the two environments. The catch is the cold requirement — a heated greenhouse that never gets cold will not vernalize garlic, so growers rely on the natural cold of an unheated structure or on pre-chilled cloves.
Method 4: Hydroponic and soilless systems
Growing garlic without soil is feasible and increasingly documented. A peer-reviewed overview describes garlic production across deep-water culture (DWC), nutrient film technique (NFT), drip, and bubbleponics systems with appropriate nutrition and environmental control. More broadly, root, rhizome, and bulb crops have been grown commercially in perlite hydroponics, NFT, ebb-and-flow, and aeroponic systems — so soilless garlic is a reasonable project, not a novelty stunt.
Be clear-eyed about the trade-off: feasible is not the same as easy. Indoor and hydroponic garlic is the most demanding of the four methods. It still needs vernalization (via pre-chilled cloves), it demands high light over a long cycle, and — as the next section notes — the precise nutrient-solution setpoints for garlic are not yet backed by peer-reviewed values.
Hydroponic Garlic: System Selection and Practitioner Setpoints
System choice. The reviewed options for garlic include DWC, NFT, drip, and bubbleponics; ebb-and-flow is also used by hobby growers. For a bulb crop that dislikes waterlogging, systems that keep the basal plate oxygenated and avoid a permanently saturated bulb zone tend to perform best.
A necessary honesty flag on EC and pH. You will find specific electrical-conductivity and pH targets for hydroponic garlic circulating online, but these come from practitioner sources rather than peer-reviewed trials — no published EC/pH setpoint specific to garlic was found in the research base. Treat any such numbers as starting points to calibrate against your own plants, not as established science. General hydroponic-vegetable practice — a mildly acidic solution and conservative nutrient strength adjusted up as the plant bulks — is a more defensible framing than a single "correct" garlic value.
What the research does support: garlic responds strongly to sulfur, which co-drives both yield and the allicin (flavor and medicinal) content of the bulb. Whatever system you choose, don't neglect sulfur.
Feeding Garlic
Garlic is a moderately hungry crop, and nutrition affects both size and flavor — but nitrogen is not the whole story. Machine-learning-based dosage modeling shows garlic's nutrient needs are feature-specific rather than a simple "more N is better" relationship, and a single-region field study famously argued that a modest nitrogen rate (on the order of 50 lb/acre) was sufficient in its conditions — a reminder that fertilizer recommendations are regional, not universal.
The most under-appreciated nutrient is sulfur: peer-reviewed work links sulfur supply directly to both bulb yield and allicin concentration, the compound behind garlic's pungency and much of its reputed health value.
Because precise feeding rates depend on your variety, medium, and system, we keep the stage-by-stage nutrient targets on the dedicated garlic plant page, where they can be maintained alongside the rest of garlic's growing data rather than duplicated here.
Garlic Scapes (Hardneck Only)
In early summer, hardneck garlic sends up a curling flower stalk called a scape. Removing it is one of the highest-return jobs in the garlic bed: two independent extension sources report that cutting scapes off redirects the plant's energy from flowering into the bulb, increasing final bulb size. Snap or snip them off once they curl, and enjoy them — scapes are a mild, garlicky vegetable in their own right. (Softneck types generally don't produce scapes.)
Harvesting, Curing, and Storing
When to harvest
Garlic signals readiness through its leaves, not a calendar date. Harvest when the lower leaves have yellowed and browned but several upper leaves are still green — each green leaf corresponds to an intact papery wrapper protecting the bulb, so lifting while some remain green keeps the bulb well-wrapped for storage. Depending on region and variety, this typically falls between late June and August.
Lift bulbs gently with a fork rather than pulling by the stems, which can tear the neck or bruise the bulb. A day or two before harvest, stop watering so the bulbs lift from drier soil.
Curing
Cure harvested garlic in a warm, dry, well-ventilated, shaded spot — out of direct sun — for roughly two to four weeks, until the necks are fully dry and papery and the outer wrappers rustle. Leave the tops and roots on during curing; trim them only once the bulbs are fully cured. This step is what turns a fresh-dug bulb into one that will keep for months, so don't rush it. (Curing timelines here rest largely on horticultural best-practice sources rather than controlled trials — treat the 2–4 week window as well-established practice, and judge by the dryness of the neck rather than the calendar.)
Storage
Where you keep cured garlic matters as much as how you cured it, and the science here is counterintuitive: garlic sprouts fastest at cool-but-not-cold temperatures — roughly 5–18 °C — the same intermediate range that vernalizes a clove in the ground. Sprouting is suppressed only at the two ends of the scale, so there are two sound options:
- Long keeping: dedicated cold storage just below freezing, at −1 to 0 °C and 60–70% relative humidity with good airflow, holds well-cured bulbs for many months (commercial cold rooms reach nine or more).
- Kitchen use: a cool, dark, dry, airy spot at ordinary room temperature (about 20–30 °C) and moderate humidity (under ~75%) keeps garlic in good shape for a shorter run — the everyday pantry approach.
The trap is the range in between: a household refrigerator (around 4 °C) sits right in the sprouting band and runs humid, so it both cues the bulb to sprout and invites rooting and mold — the worst place for garlic you mean to eat. (The one deliberate exception is pre-chilling seed cloves to supply a missing winter, covered in the vernalization section above: there that same fridge temperature is exactly the cue you want — just keep your planting stock separate from your eating stock.)
Across either method, how long garlic lasts depends heavily on type: softneck generally keeps longer (often 6–8 months, sometimes more), while hardneck types store for a shorter window (roughly 3–5 months). Treat those month counts as guidance rather than guarantees — they come from horticultural sources rather than peer-reviewed storage trials, and real-world keeping quality varies with variety, curing, and conditions. Whatever the method, don't seal cured bulbs in plastic, which traps moisture and invites rot.
A Few Common Problems
- Rounds instead of bulbs: almost always too little cold — insufficient vernalization. Plant earlier in fall, choose a variety suited to your winter, or pre-chill cloves.
- Small bulbs: small planting cloves, skipped scape removal on hardnecks, crowding, or weed competition.
- Rot in the bed: soilborne allium diseases such as white rot and basal rot persist in soil; rotate garlic and other alliums to fresh ground and avoid replanting where they've grown recently.
The Short Version
Garlic rewards a grower who plants in fall, lets winter do its work, and harvests by watching the leaves. Pick a type that matches your climate (hardneck for cold winters, softneck for mild ones), plant your biggest cloves pointed-end up 5–7 cm deep, make sure they get their cold, remove hardneck scapes, and lift when the lower leaves brown while several stay green. Cure for a few weeks, store cool and dry, and set aside your best bulbs to plant again. Whether you grow in a bed, a pot, a greenhouse, or a soilless system, that rhythm stays the same — the environment mainly changes how much attention you supply and how the final bulb turns out.
For garlic's full growing-condition data and nutrient targets, see the garlic plant page.