Grow Your First Oyster Mushrooms at Home in as Little as 4 Weeks
Learn how to grow oyster mushrooms at home with this science-backed guide. Covers substrate preparation, pasteurization, spawning, fruiting conditions, and harvesting — plus a comparison of blue, pink, and pearl oyster varieties for beginners.
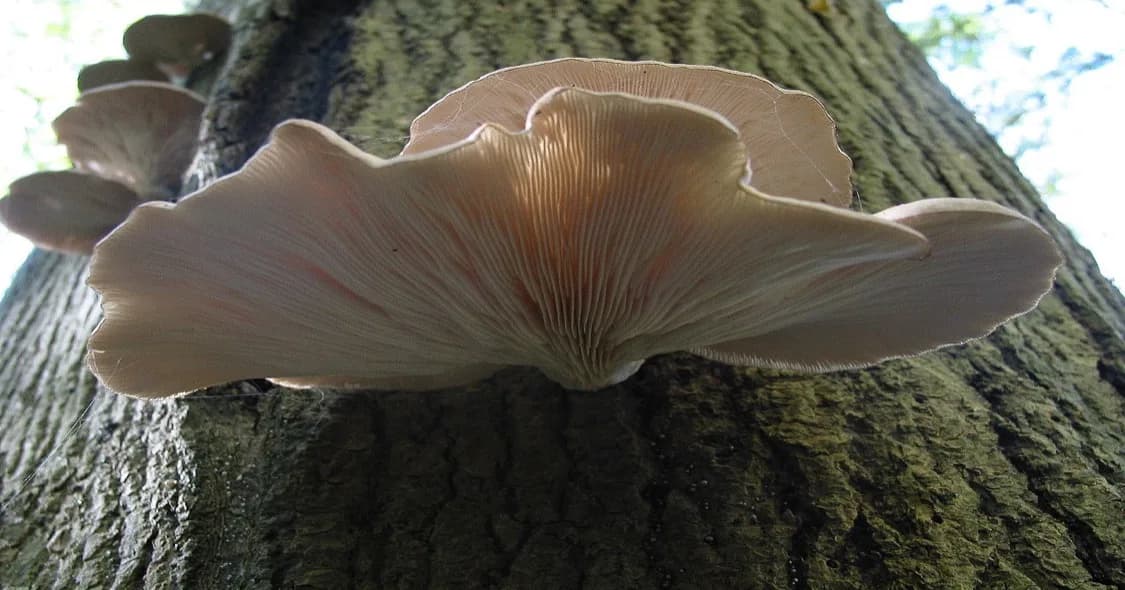
Key point: Oyster mushrooms (Pleurotus ostreatus) are the most beginner-friendly mushrooms you can grow at home. They colonize fast, tolerate a wide range of substrates — straw, sawdust, even coffee grounds — and produce their first harvest in as little as 3-5 weeks. No sterile lab, no pressure cooker, no prior experience required. Just pasteurized substrate, some spawn, and a humid spot with fresh air.
Why grow oyster mushrooms
Oyster mushrooms are the world's second most cultivated mushroom after the button mushroom (Agaricus bisporus), and for good reason. They're aggressive colonizers that outcompete contamination better than almost any other edible species, they grow on practically any agricultural waste, and they produce dense clusters of meaty, flavorful caps in multiple harvest cycles called "flushes."
The name comes from the shell-shaped caps, which fan out in overlapping clusters from a central stem — resembling oyster shells. Mature caps range from 5 to 25 cm across depending on the variety and growing conditions. In the wild, Pleurotus species grow on dead hardwood trees across every continent except Antarctica.
For home growers, the appeal is practical: oyster mushrooms require less precision than species like shiitake or lion's mane, they fruit at room temperature, and a single 2 kg wet substrate bag can produce 300-800 g of fresh mushrooms across 2-3 flushes. The entire cycle from inoculation to first harvest takes roughly 3-5 weeks.
Nutritional value and health benefits
Beyond culinary value, oyster mushrooms deliver an unusually complete nutritional profile for a non-animal food. A comprehensive review in Mycobiology documented that Pleurotus species contain 19-35% protein (dry weight), all essential amino acids, dietary fiber, B vitamins (especially niacin and riboflavin), and minerals including potassium, phosphorus, iron, and zinc.
The standout compound is pleuran, a (1,3/1,6)-beta-glucan unique to Pleurotus species. Unlike the linear beta-glucans in oats and barley, pleuran has a branched structure that enhances its solubility and biological activity. Research has linked mushroom beta-glucans to immunomodulatory effects, including enhanced natural killer cell activity and macrophage stimulation, though human clinical trials remain limited in scope.
A 2020 systematic review of clinical trials found that P. ostreatus intake showed beneficial effects on glucose metabolism — reducing fasting and postprandial glucose — and on lipid profiles, decreasing total cholesterol, LDL-cholesterol, and triglycerides in several studies. The authors noted, however, that evidence strength remains low due to small sample sizes and study design limitations. These findings are informational and do not constitute medical advice; individuals managing blood glucose or lipid conditions should discuss dietary changes with their healthcare provider.
Oyster mushrooms also contain lovastatin, a naturally occurring statin compound. The concentrations in typical dietary portions are far below pharmaceutical doses. That said, individuals currently taking statin medications should consult their healthcare provider if they have concerns about dietary lovastatin intake.
Choosing your variety
Three oyster mushroom varieties dominate home cultivation, each with distinct temperature preferences and growth characteristics:
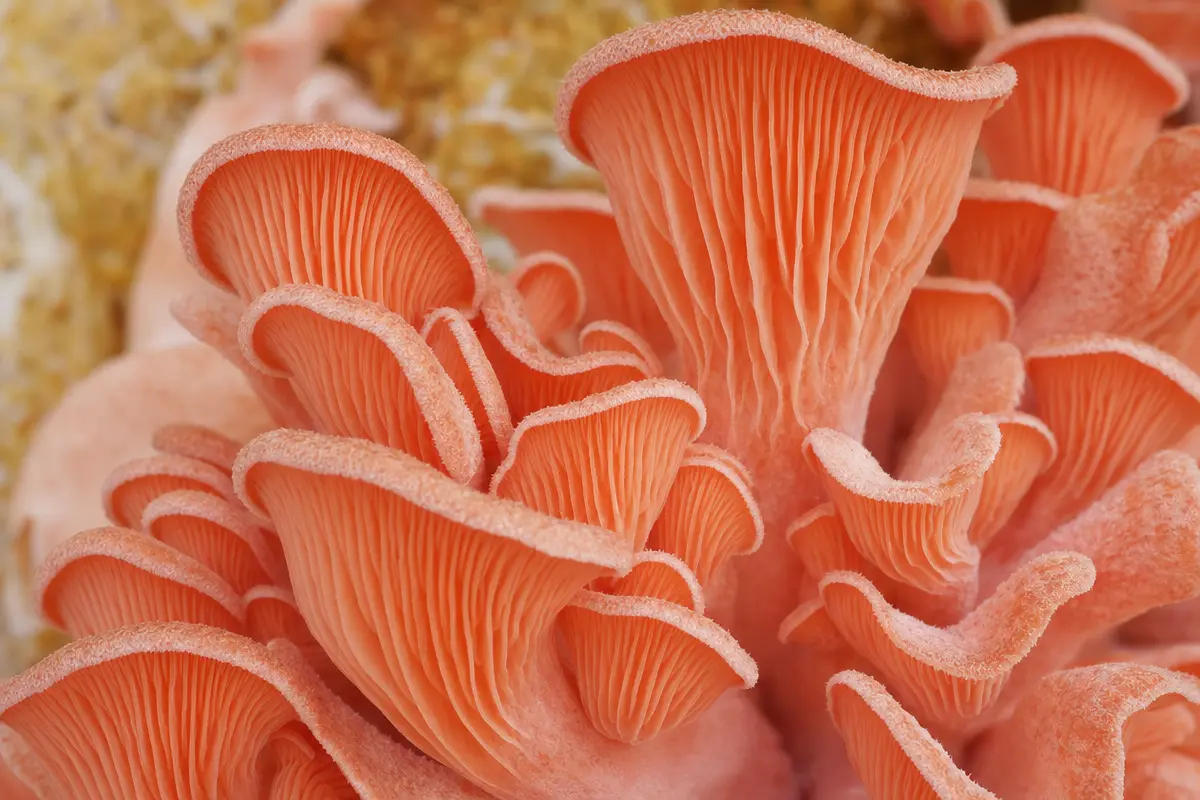
Pearl Oyster (Pleurotus ostreatus)
The classic. Pearl oysters produce large, pale gray-to-white caps with a mild, slightly sweet flavor. They fruit best at 15-21°C (59-70°F), making them ideal for year-round indoor growing in most climates. Pearl oysters are the most forgiving variety — they tolerate temperature fluctuations, imperfect humidity, and a wide range of substrates. Best for: first-time growers in temperate climates.
Blue Oyster (Pleurotus ostreatus var. columbinus)
Blue oysters produce striking steel-blue caps that fade to gray as they mature. They prefer cooler conditions — 10-18°C (50-65°F) — and are among the fastest colonizers of all oyster varieties. The caps are thicker and meatier than pearl oysters, with a slightly more pronounced flavor. Best for: growers in cooler climates or those with unheated spaces like basements and garages.
Pink Oyster (Pleurotus djamor)
The tropical variety. Pink oysters produce vivid coral-pink caps and fruit best at warmer temperatures of 18-30°C (65-85°F). They boast some of the fastest growth times in the genus — as little as 3-4 weeks from inoculation to harvest. The flavor is distinctive: slightly nutty with a meaty texture that crisps up like bacon when fried. Best for: growers in warm climates or during summer months.
Temperature summary: Blue oysters need it cool (10-18°C), pearl oysters like the middle (15-21°C), and pink oysters want warmth (18-30°C). Pick the variety that matches your growing space.
What you need to get started
Oyster mushroom cultivation requires minimal equipment compared to species like Cordyceps militaris or shiitake. Here's what you need:
Spawn:
- Grain spawn (rye, wheat, or millet colonized with oyster mushroom mycelium) — purchase from a reputable supplier. Grain spawn is preferred for beginners because it distributes evenly through the substrate. Expect to use 5-10% spawn by weight relative to your substrate. Academic literature reports rates as low as 2%, but higher rates speed colonization and reduce contamination risk for beginners.
Substrate:
- Wheat or barley straw (most common and reliable)
- Hardwood sawdust or pellets (oak, maple, beech — never softwood)
- Coffee grounds (supplement only — too nitrogen-rich as a sole substrate)
- Cardboard or shredded paper (works but produces lower yields)
Containers:
- 5-gallon buckets with drilled holes (the bucket tek) — the easiest method
- Polypropylene grow bags — more surface area, better yields
- Laundry baskets lined with plastic — good for straw logs
Environment:
- A humid location with indirect light and fresh air — a bathroom, closet, or basement works well
- A spray bottle or humidifier
- A thermometer and hygrometer
Total startup cost: $20-40 USD for spawn, substrate, and containers (US market pricing; costs vary by region). No pressure cooker or laminar flow hood required.
Step 1: Prepare the substrate
The substrate is the food source your mushroom mycelium will decompose and fruit from. Proper preparation is the single most important step — it hydrates the material, eliminates competing microorganisms, and creates the conditions for your spawn to colonize without contamination.
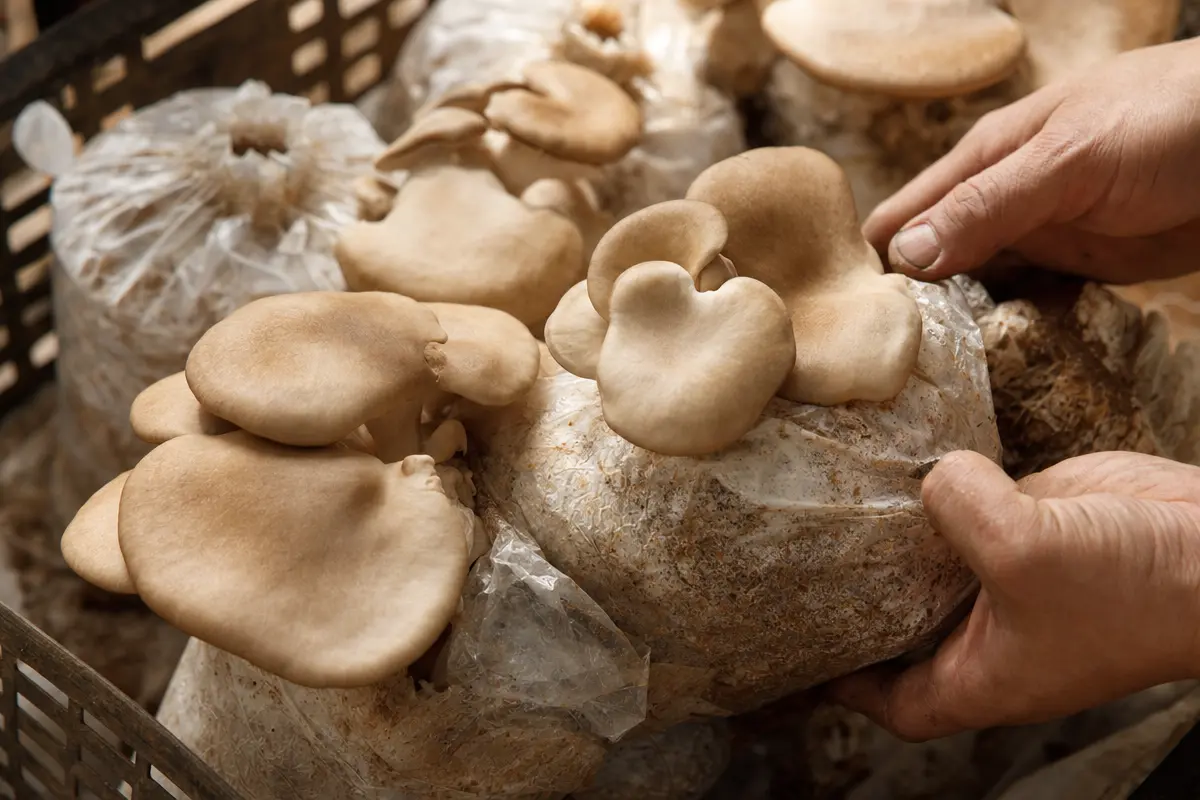
Straw substrate (recommended for beginners)
Wheat straw is the gold standard for oyster mushrooms. Research consistently shows that straw-based substrates produce faster colonization and higher biological efficiency than sawdust alone — one study recorded colonization in as few as 13 days on mixed substrates compared to 18 days on pure sawdust.
Preparation:
-
Chop the straw into 5-10 cm pieces. This isn't decorative — shorter pieces pack more densely, reducing air pockets where contaminants can establish.
-
Pasteurize using one of two methods:
-
Hot water bath (fastest): Submerge the chopped straw in water heated to 65-80°C (150-175°F) for 1-2 hours. You can use a large stock pot, a cooler filled with boiling water, or a metal drum over a propane burner. The goal is to hold the temperature above 60°C long enough to kill Trichoderma spores and other competitors without sterilizing — some beneficial bacteria survive and actually help suppress future contamination.
-
Cold water lime bath (easiest): Submerge straw in cold water with hydrated lime (calcium hydroxide) at a rate of 10 g per liter, raising the pH to 12-13. Soak for 12-18 hours, then drain. The alkaline environment kills most contaminants. This method uses no heat and is favored by many small-scale growers.
-
-
Drain thoroughly. After pasteurization, let the straw drain until it reaches the right moisture content — the "squeeze test." Grab a fistful and squeeze hard: a few drops of water should come out, but it shouldn't stream. This corresponds to roughly 65-70% moisture content.
Sawdust substrate (alternative)
If using hardwood sawdust or pellets, you'll need to add a nitrogen supplement — typically wheat bran at a 10-20% ratio by weight. Soak hardwood pellets in hot water (they'll expand 3-4x), then pasteurize using the same methods as straw. Sawdust substrates produce denser, firmer caps but colonize more slowly.
Step 2: Inoculate and colonize
Inoculation means mixing your grain spawn evenly throughout the prepared substrate so the mycelium can colonize the entire mass.
-
Layer the drained substrate and grain spawn in your container. For bucket tek: alternate layers of straw and spawn, pressing down gently. For grow bags: mix thoroughly in a clean container, then pack into the bag. Target a 5-10% spawn rate — roughly 250-500 g of grain spawn per 5 kg of wet substrate.
-
Seal the container. For buckets, put the lid on loosely. For grow bags, fold the top over and secure with a clip, leaving some air exchange. The mycelium needs oxygen during colonization but very little fresh air exchange — passive gas exchange through a few small holes is sufficient.
-
Store in the dark at 20-25°C (68-77°F). This temperature range is critical — substrate temperatures above 30°C during colonization promote Trichoderma outbreaks, the most common contamination in oyster mushroom cultivation. Stay below 28°C to provide a safety margin, since metabolic heat can raise substrate core temperatures 2-4°C above ambient. A closet, cupboard, or any room-temperature dark space works perfectly.
-
Wait 14-21 days. The mycelium will appear as white, thread-like growth spreading outward from each grain of spawn. The substrate is fully colonized when it's entirely covered in a dense white mat with no visible uncolonized areas. You may notice the substrate warming slightly — this is normal metabolic heat from the mycelium.
Contamination check: Healthy oyster mushroom mycelium is bright white and has a pleasant, mushroomy smell. Green, black, pink, or orange patches indicate contamination. Small spots can sometimes be cut away, but if more than 10% of the surface is affected, discard the block and start fresh. Green patches are almost always Trichoderma — the primary competitor of Pleurotus cultivation worldwide.
Step 3: Initiate fruiting
Once colonization is complete, it's time to trigger the mushroom to form fruiting bodies (the part you eat). This requires a shift in environmental conditions.
-
Expose to fresh air and light. Move the colonized block to your fruiting area. If using a bucket, remove the lid. If using a grow bag, cut 5-8 cm X-shaped slits every 15-20 cm — the mushrooms will fruit from these openings. Oyster mushrooms need indirect light (not direct sunlight) for 8-12 hours daily to develop properly formed caps.
-
Drop the temperature. Most varieties fruit best at 15-21°C (59-70°F) — 3-5°C cooler than colonization temperature. Research shows that a cold shock of 5-10°C accelerates pinning (the formation of tiny mushroom primordia). Even placing the block in a cooler room or near an open window overnight can be enough.
-
Raise humidity to 85-95%. This is the factor most beginners underestimate. Oyster mushrooms need consistently high humidity during fruiting — below 80% and the pins dry out and abort. Methods:
- Mist the area around the block (not directly on the pins) 2-4 times daily
- Place the block inside a clear plastic storage bin with holes drilled for air exchange — a "shotgun fruiting chamber"
- Run a cool-mist humidifier nearby
-
Maintain airflow. Fresh air is essential. High CO2 from poor ventilation causes long, spindly stems with tiny caps — a classic sign of insufficient air exchange. Fan the fruiting area or open ventilation holes for several minutes a few times daily.
The fruiting environment at a glance
| Parameter | Target Range |
|---|---|
| Temperature | 15-21°C (59-70°F) for pearl/blue; 18-30°C (65-85°F) for pink |
| Humidity | 85-95% RH |
| Light | Indirect, 8-12 hours/day |
| Fresh air | Regular exchanges, low CO2 |
Step 4: Harvest
Pins appear 3-7 days after fruiting conditions are established — small nubs that rapidly develop into recognizable mushroom clusters. From pin to harvest-ready takes another 3-5 days. Oyster mushrooms grow fast — you can literally watch them change size within hours.
When to harvest: Pick when the cap edges are still slightly curled downward or just beginning to flatten. Once the edges turn upward and the caps become wavy, the mushrooms are past peak — they'll release spores (a fine white dust) and the flesh becomes tougher. Harvesting slightly early gives you the best texture and shelf life.
How to harvest: Twist and pull the entire cluster at the base. Don't cut individual mushrooms — breaking the cluster cleanly from the substrate promotes faster regrowth for the next flush.
Second and third flushes
After harvesting, soak the substrate block in cold water for 6-12 hours (this is called "dunking"), then return it to fruiting conditions. A second flush typically appears 7-14 days later, producing 60-80% of the first flush's yield. A third flush is possible but yields diminish to roughly 30-50% of the first flush. As a rough guide: if your first flush produces 250 g, expect around 150-200 g from the second and 75-125 g from the third, for a total of roughly 475-575 g. Actual totals vary with substrate quality and environmental control.
Expected total yield: 300-800 g of fresh mushrooms from a 2-3 kg substrate block (wet weight), depending on substrate quality, number of flushes, and environmental control. Two flushes typically account for the bulk of production; a third flush is possible but yields diminish. That's a biological efficiency of roughly 50-100% — meaning you can produce mushroom biomass (wet weight) equal to or exceeding the dry weight of your starting substrate.
Week-by-Week Growth Calendar
Use this timeline to track progress from inoculation through your first three harvests. Adjust timing based on variety and temperature — blue oysters trend toward the slower end, pink oysters toward the faster end.
| Week | Day Range | Stage | What to Expect | Action |
|---|---|---|---|---|
| 1 | 0-7 | Early colonization | White mycelium visible around grain spawn by day 3-5. No fruiting activity. Slight warmth from metabolic activity. | Keep sealed in darkness at 20-25°C. Do not open or disturb. Check for off-smells only. |
| 2 | 8-14 | Active colonization | Mycelium spreading rapidly across substrate. White patches merging. Substrate warming 2-4°C above ambient. | Monitor for green or orange patches. If contamination covers <10%, isolate block. Maintain 20-25°C. |
| 3 | 15-21 | Full colonization | Dense white mat covering entire substrate surface. Strong, pleasant mushroomy aroma. Block feels firm when pressed gently. | Once fully colonized, prepare fruiting area. A few extra days of consolidation strengthen the mycelium before fruiting. |
| 3-4 | 21-28 | Fruiting initiation | Pin formation begins 3-7 days after environmental shift. Tiny white bumps appear at holes or slits. Pins double in size daily. | Move to fruiting conditions: 15-21°C, 85-95% RH, 8-12 h indirect light, fresh air 3-4 times daily. Mist surroundings, not pins directly. |
| 4-5 | 28-35 | First harvest | Clusters mature rapidly — caps unfurl over 2-3 days. Harvest when edges are still slightly curled. | Twist and pull whole clusters at the base. Expect 200-350 g from a 2-3 kg block. |
| 5-7 | 35-49 | Second flush | After dunking for 6-12 hours, pins reappear in 7-14 days. Second flush yields 60-80% of first. | Dunk block in cold water, return to fruiting conditions. Maintain humidity — blocks dry out faster the second time around. |
| 7-9 | 49-63 | Third flush (optional) | Diminishing returns. Third flush yields roughly 30-50% of first flush. Substrate may show exhaustion signs (soft, discolored). | If contamination appears or yield drops below 100 g, compost the block. Spent substrate makes a nutrient-rich garden soil amendment. |
Tip: Keep a simple log noting the date of inoculation, first visible mycelium, full colonization, pin formation, and each harvest weight. This data helps you optimize future grows and identify environmental variables that affect your results.
Troubleshooting common problems
No prior experience is needed to get your first harvest, but every grower develops diagnostic skills over successive cycles. The issues below are uncommon when substrate preparation and humidity are dialed in — think of this section as a reference you'll consult if something looks off, not a checklist you'll need on day one.
Green mold (Trichoderma spp.)
The most frequent issue. Bright green patches on the substrate surface indicate Trichoderma contamination — species like T. harzianum, T. pleurotum, and T. pleuroticola are specifically adapted to Pleurotus substrates.
Prevention is everything: pasteurize thoroughly (hold at 65-80°C for 1-2 hours, or at 60°C for 10+ hours for full heat penetration), keep colonization temperatures below 28°C, and use fresh spawn from a reputable supplier. Alkaline substrates (pH 8-9) slow Trichoderma growth while remaining tolerable for oyster mushroom mycelium.
Long stems, tiny caps
This is a CO2 problem, not a light problem. Increase fresh air exchange — fan the fruiting chamber more frequently or enlarge ventilation holes. Oyster mushrooms are highly sensitive to elevated CO2 and will elongate their stems trying to "reach" fresh air.
Pins drying out and aborting
Humidity dropped below 80% at a critical moment. Increase misting frequency and consider a more enclosed fruiting chamber. A simple shotgun fruiting chamber — a clear plastic tote with 1 cm holes drilled every 5 cm on all sides — maintains humidity far more consistently than open-air fruiting.
Slow or stalled colonization
Usually indicates one of three things: spawn is old or compromised, substrate is too wet (waterlogged), or temperature is too low. Check that your colonization environment is consistently 20-25°C. If the substrate releases water when squeezed lightly (not firmly), it's too wet — drain more thoroughly next time.
Bacterial blotch
Brown, sunken lesions on mature caps caused by Pseudomonas tolaasii bacteria. This happens when water sits on cap surfaces in stagnant air. Prevention: mist the environment (walls, floor) rather than the mushrooms directly, and ensure adequate airflow.
Advanced Contamination Identification & Recovery
Beyond the common issues above, experienced growers encounter a broader range of competitors and pathogens. This diagnostic matrix covers the full spectrum of contamination types in Pleurotus cultivation.
Contamination Identification Matrix
| Visual Sign | Smell | Likely Cause | Severity | Action |
|---|---|---|---|---|
| Bright green patches | Earthy, musty | Trichoderma spp. | High | Discard if >10% surface. Isolate immediately — spores spread to nearby blocks |
| Gray-green with powdery spores | Faint musty | Aspergillus spp. | Medium | Remove affected area +5 cm margin. Increase air exchange. Monitor daily |
| White fluffy overgrowth (faster than mycelium) | Sweet, slightly off | Mucor spp. (pin mold) | Medium | Often from waterlogged substrate. Improve drainage in next batch. Remove if localized |
| Cobweb-like gray overlay | None or faintly sweet | Cladobotryum mycophilum (cobweb mold) | Medium | Spot-treat with 3% hydrogen peroxide spray. Increase airflow significantly |
| Black spots on substrate | Sour | Rhizopus (black bread mold) | Low-Medium | Cut away affected area. Usually indicates under-pasteurized substrate |
| Orange or pink slime | Sour, fermented | Bacterial contamination (Bacillus spp.) | High | Discard block. Indicates pasteurization failure or excessively wet substrate |
| Brown sunken lesions on caps | Fishy | Pseudomonas tolaasii | Low | Reduce direct misting on caps. Increase ventilation |
| Tiny flying insects near blocks | N/A | Sciarid flies (fungus gnats) | Low-Medium | Deploy yellow sticky traps. Screen ventilation holes with fine mesh. Larvae feed on mycelium and reduce yields |
Recovery Protocol Decision Tree
-
Contamination during colonization (weeks 1-3):
- If <5% surface area affected: remove contaminated material plus a 5 cm margin, apply 3% hydrogen peroxide to the exposed area, re-seal and monitor daily
- If 5-10% affected: isolate the block in a separate room. If contamination hasn't spread in 48 hours, the mycelium may outcompete it
- If >10% affected: discard the entire block. Do not compost contaminated substrate near your growing area — Trichoderma spores persist in soil
-
Contamination during fruiting (weeks 3+):
- Harvest any mature clusters immediately — they are safe to eat unless visibly affected
- Contaminated blocks can sometimes finish producing a final flush before disposal
- Never reuse substrate from contaminated blocks for subsequent grows
Substrate pH as a Prevention Strategy
Alkaline-adjusted substrates (pH 8-9) created through lime treatment provide a significant competitive advantage for oyster mushroom mycelium over Trichoderma and most bacterial contaminants. Pleurotus mycelium thrives at pH 6-9, while Trichoderma species strongly prefer pH 4-6. Cold-water lime pasteurization achieves both pathogen reduction and pH adjustment in a single step, making it one of the most effective low-tech contamination prevention methods available.
What comes after: scaling up
Once you've completed a successful grow cycle, you'll likely want to scale. The path is straightforward:
- More blocks: Prepare multiple substrate bags or buckets in a single pasteurization batch. Stagger inoculation dates by 1-2 weeks so your harvests don't all hit at once.
- Dedicated fruiting chamber: A small closet, grow tent, or even a plastic greenhouse with a humidifier and a timer-controlled fan provides much more consistent conditions than open-air fruiting.
- Experiment with substrates: Try mixing straw with coffee grounds (up to 20%), sawdust with wheat bran, or sugarcane bagasse. Research shows that mixed substrates with balanced C:N ratios consistently outperform single-material substrates in both colonization speed and yield.
If you've already grown Cordyceps militaris, you'll find oyster mushrooms refreshingly forgiving — no sterile technique, no liquid culture syringes, and results in half the time.
Commercial Scaling Guide
Audience note: The section below is written for growers who have completed three or four successful home cycles and are exploring small-scale commercial production. If you're still working through your first grow, bookmark this for later — the home-growing steps above are all you need right now.
Moving from hobby to small commercial production requires systematic process management. Here is what the data shows about scaling oyster mushroom operations.
Yield Projections
Commercial growers using optimized substrates and environmental controls achieve significantly higher and more consistent yields than home setups:
| Substrate | Biological Efficiency | Yield per kg Dry Substrate | Typical Bag Size | Yield per Bag |
|---|---|---|---|---|
| Wheat straw | 75-100% | 750-1000 g fresh | 2-3 kg dry | 1.5-3.0 kg |
| Straw + coffee grounds (80:20) | 85-110% | 850-1100 g fresh | 2-3 kg dry | 1.7-3.3 kg |
| Hardwood sawdust + bran (85:15) | 60-85% | 600-850 g fresh | 2-3 kg dry | 1.2-2.5 kg |
| Sugarcane bagasse | 70-95% | 700-950 g fresh | 2-3 kg dry | 1.4-2.8 kg |
Biological efficiency ranges based on Gebru et al. 2024 and Raman et al. 2020. Note: commercial yields above are calculated on a dry substrate weight basis, unlike the home-grower figures earlier in this guide which reference wet substrate weight. A 2 kg wet substrate block contains roughly 600-700 g of dry matter.
Fruiting Room Design
A dedicated fruiting room for 50-100 blocks requires:
- Space: 10-15 m² with metal shelving (4-5 tiers at 40 cm spacing between tiers)
- Humidity: Ultrasonic humidifier with humidistat controller, targeting 85-95% RH. Budget approximately $150-300 for the humidifier and controller
- Air exchange: Inline duct fan (150 mm) on a 15-minute cycle timer providing 4 exchanges per hour minimum. Filter fresh air intake through a furnace filter to reduce airborne contaminant spore load
- Lighting: 6500K fluorescent or LED strip, 8-12 hours on timer. Mushrooms need light for cap formation but not for energy — low intensity (500-1000 lux) is sufficient
- Temperature: Most commercial operations grow pearl or blue varieties at 15-18°C (59-64°F). Insulated rooms with a small AC unit or evaporative cooler provide cost-effective temperature control
Batch Scheduling for Continuous Production
Stagger inoculations to produce a steady harvest stream:
| Week | Inoculate | Fruiting | Harvest | Notes |
|---|---|---|---|---|
| 1 | Batch A (20 bags) | — | — | |
| 2 | Batch B (20 bags) | — | — | |
| 3 | Batch C (20 bags) | Batch A | — | Batch A enters fruiting |
| 4 | Batch D (20 bags) | Batch B | Batch A | First harvest from A |
| 5 | Batch E (20 bags) | Batch C | Batch B | Continuous weekly harvest begins |
With 20 bags per weekly batch and an average yield of 1.5-2.0 kg per bag across 2 flushes, expect 30-40 kg of fresh mushrooms per week at steady state. At typical wholesale rates of $6-10/kg, that represents $180-400/week gross revenue from a 15 m² room.
Cost Analysis per 100-Bag Cycle
| Item | Cost | Notes |
|---|---|---|
| Grain spawn (100 bags at 300 g each) | $120-180 | Bulk pricing from commercial suppliers |
| Substrate (wheat straw, 300 kg) | $40-80 | Sourced from local farms or feed stores |
| Bags and supplies | $30-50 | Polypropylene bags, ties, labels |
| Utilities (4 weeks) | $40-60 | Humidifier, fan, lighting |
| Total per cycle | $230-370 | |
| Expected yield (2 flushes) | 150-200 kg | From 100 bags |
| Revenue at $8/kg | $1,200-1,600 | Wholesale or farmers market average |
Labor is the largest unaccounted cost. Expect 8-12 hours per week for a 100-bag operation covering substrate preparation, inoculation, monitoring, harvesting, and packaging.
Looking to expand your indoor growing setup? Check out our guide to LED grow light spectrum science for optimizing any growing environment, or explore Kratky method passive hydroponics if you want to pair mushrooms with low-maintenance herb growing.