How to Propagate Rosemary, Sage, and Thyme from Cuttings
Learn how to propagate rosemary, sage, and thyme from cuttings. Follow one practical setup for shoot selection, humidity, rooting checks, and potting up.
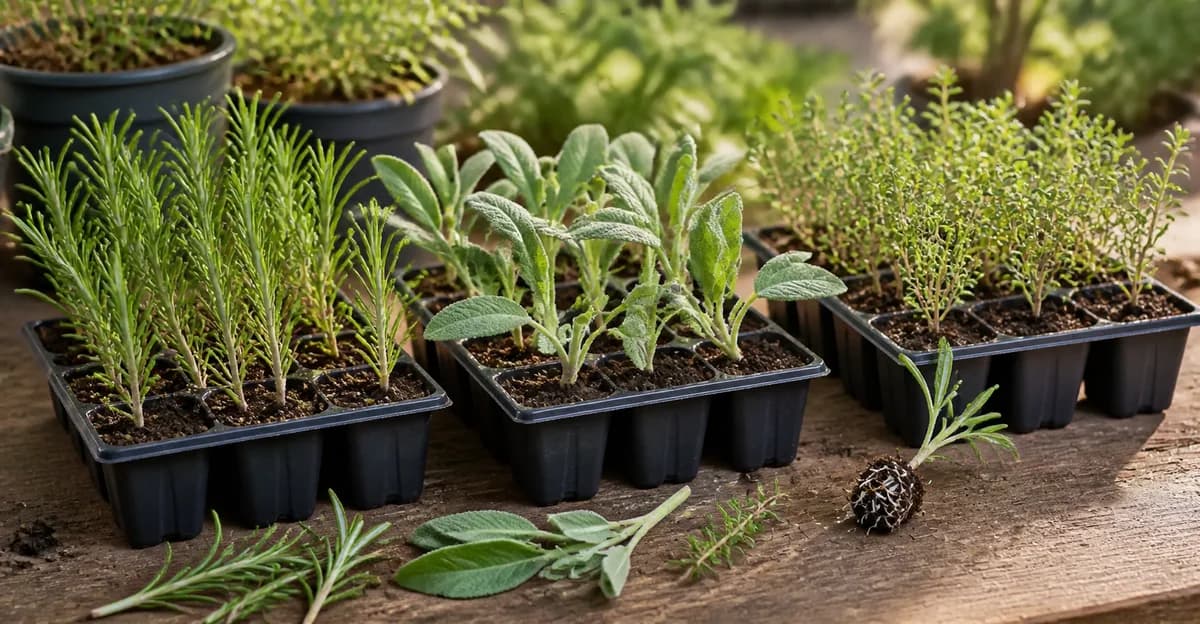
Key point: You can propagate rosemary (Salvia rosmarinus), common sage (Salvia officinalis), and common thyme (Thymus vulgaris) with the same basic setup: healthy nonflowering shoots, clean cuts, a moist and airy growing medium, high humidity with some fresh air, and bright indirect light. The species do not always root at the same pace, so check the roots instead of potting every cutting up on one date.
The method is forgiving about equipment. Clean snips, small pots or cells, fresh growing medium, labels, water, and a loose clear cover are enough to start. Rooting hormone is optional, and the covered cuttings still need ventilation.
Use one setup, with small changes for each herb
The shared workflow works because all three herbs can form roots from vegetative stem tips. What changes is the best shoot on the day you collect it. Rosemary can be taken from soft young tips or firmer semi-ripe growth. Sage responds well to young nonflowering tips. Thyme needs a small, workable tip with enough leaves left above the growing medium.
| Herb | Material to choose | Practical size cue | What to expect |
|---|---|---|---|
| Rosemary | Healthy tip growth that is soft to semi-ripe, depending on the stage of the growing season | Reviewed rosemary methods range from compact tips to longer stem sections | Often needs a later readiness check than sage or thyme; wait for a stable root system |
| Common sage | A healthy, nonflowering shoot tip from a plant in active growth | A short tip with several leaves above the medium; research and institutional methods use small to medium shoot tips | Can root within several weeks, but mother-plant condition and season can change the result |
| Common thyme | A small vegetative stem tip that is long enough to strip at the base without losing the whole leaf canopy | Use a compact tip and keep the upper foliage intact | Begin checking with sage, then leave it longer if roots have not secured the medium |
These are handling cues, not fixed scientific optima. Trials used different cultivars, cutting lengths, seasons, media, and propagation environments. That variation is a reason to read the cutting in front of you instead of forcing all three herbs into an identical schedule.
Take cuttings during active vegetative growth
Look for fresh growth before flowers open. Choose a healthy shoot with no visible damage, disease symptoms, or wilt. Remove any flower or flower bud from material you still decide to use.
The most useful timing cue is the plant's growth stage. Soft tips are widely recommended during spring-like to early-summer conditions, wherever those conditions fall in your hemisphere. Rosemary also provides suitable semi-ripe shoots later in the active growing season. This growth-stage approach travels better than a month-by-month rule.
Mother-plant condition matters too. Rosemary experiments found differences among plant populations and collection seasons, while the common-sage study found differences tied to season and the source of the mother plants. A weak, flowering, or stressed parent is a poor place to collect your best material.
The evidence shows that the method can work, but it does not support a guaranteed success rate for a home windowsill.
Gather a clean, moisture-balanced setup
You need:
- Clean, sharp snips or a clean knife
- Small pots, cells, or another container with drainage
- Fresh growing medium that holds moisture but leaves air around the stem base
- Plant labels
- Clean water
- A loose clear bag, dome, or similar humidity cover, if your room is dry
- A labeled consumer rooting-hormone product, if you choose to use one
Research trials have rooted these herbs in several different porous blends, including peat with perlite and sand with perlite. That does not make one recipe universally best. At home, choose a fresh propagation mix or another clean, free-draining mix that stays evenly moist without becoming dense or waterlogged.
Premoisten the medium before inserting the stems. You want it damp throughout, with no standing water in the container. A saturated base reduces the air available around the buried stem and creates the stagnant conditions that propagation guidance warns against.
Prepare and insert each cutting
1. Cut below a node
Take a healthy shoot tip and make a clean cut below a leaf joint, also called a node. Keep the upper portion leafy and remove any flower material.
Work with one herb at a time or label each container before you start so the prepared cuttings do not get mixed up.
2. Strip the lower leaves
Remove the leaves from the part of the stem that will sit in the growing medium. Leave an upper canopy rather than stripping the whole cutting, and keep the remaining leaves above the surface.
For a small thyme tip, this may mean clearing only a short section. A firmer rosemary piece can give you more bare stem to insert. The goal is a stable cutting with foliage above the surface, not one exact length for every species.
3. Decide whether to use rooting hormone
Rooting hormone can help some rosemary and sage material, but its effect changes with species, season, parent plant, product, and dose. A controlled trial also rooted rosemary, sage, and thyme stem tips without hormone. Taken with institutional guidance that treats hormone as optional, this shows that it is not required for every cutting.
If you use hormone, choose a consumer product labeled for cuttings and follow its directions. Do not copy the concentrations or chemical combinations from research trials. Those experiments tested specific products and controlled conditions, not a home recipe.
4. Make a hole and insert the stem
Insert the stripped base into the premoistened medium, then press gently around the stem so it stands upright.
Keep the medium moist, and let excess water drain before adding a humidity cover.
Keep humidity high without sealing out fresh air
Propagation setups reduce water loss while roots develop. Controlled studies used mist, fog, or clear covers, and institutional guidance translates the same principle into a home setup.
Place the pots in bright indirect light. Keep them away from hot direct sun, especially under plastic, because a covered space can overheat. A loose clear bag or vented dome can slow moisture loss in a dry room. Leave an opening or air the cover regularly instead of sealing the cuttings in stagnant humidity.
Check the growing medium with a fingertip. Add water when it begins to lose even moisture, but do not keep it saturated. Commercial mist schedules and trial humidity settings support the need to control water loss; they are not instructions for how often to mist a cutting on your windowsill.
If the leaves wilt, first check whether the cover is too open, the medium has dried, or the site is too warm or bright. If the stem base becomes black or soft, the medium stays soaked, or mold spreads, reduce excess moisture, admit more fresh air, and remove badly collapsing material. Those symptoms can have several causes, so do not name a pathogen from appearance alone.
Check roots after several weeks
Rooting time varies. In a shared controlled trial, sage and thyme reached a transplantable liner stage before rosemary, while separate rosemary and sage experiments assessed roots over longer windows. Treat that as a relative expectation. Your cultivar, cutting maturity, temperature, light, and humidity can move the result.
After several weeks, look for signs that a cutting is becoming established:
- Roots are visible at a drainage hole or container edge
- The growing medium begins to hold together around the cutting
- A very gentle resistance check suggests the stem is anchored
Use the last check sparingly. Repeated tugging or digging breaks new roots and tells you less than a visible root or a medium plug that holds together.
Do not discard a firm, healthy cutting because another herb rooted first. Rosemary may need more time than sage or thyme under otherwise similar conditions.
Use a Species-Aware Root Check Calendar
Use a calendar to schedule inspections, then let root development decide when you transplant. In one controlled trial, sage and thyme reached the pullable-liner stage after three weeks, while rosemary needed at least four weeks. A separate rosemary study assessed its cuttings after five weeks. These timings help you order your checks, but they do not promise the same result in your room.
| Checkpoint | What to do | Move forward when |
|---|---|---|
| Setup day | Record the herb, parent plant, collection date, shoot firmness, medium, hormone choice, and number of cuttings. | Every container is labeled and the medium is evenly moist. |
| Early checks | Look through the container or cover before handling the stems. Note wilt, standing water, mold, or a cover that stays heavily condensed. | The stems remain firm and the setup needs no moisture or ventilation correction. |
| Around week three | Start checking sage and thyme. Look first for visible roots or a plug that holds together. | Roots are visible or the rooted medium lifts as a stable plug. |
| Week four onward | Check rosemary and any sage or thyme cuttings that were still firm but unrooted. Leave healthy laggards in place. | The individual cutting meets the same root-readiness test. |
| After rooting | Pot up ready cuttings and open their cover in stages. Keep unrooted cuttings protected and labeled. | Leaves stay firm as humidity falls and the new roots hold the potting mix. |
Separate cells or small removable pots make a mixed tray easier to manage. You can move an early-rooting sage or thyme cutting without disturbing rosemary that still needs time. If all three herbs share one undivided container, inspect from the edge and avoid digging through the medium to find roots.
Pot up and lower humidity gradually
Pot up when roots are visible or hold the growing medium together. Move the rooted cutting into fresh potting mix, keeping the young root system intact.
Reduce humidity in stages. Open the cover wider, leave it off for longer periods, and watch whether the leaves remain firm. A newly rooted cutting still needs time to adjust from a humid propagation space to normal room or outdoor conditions.
Keep the new plant out of harsh direct sun during that transition. Water the potting mix so it stays evenly moist while the roots spread, then shift care toward the normal needs of the species once the plant is established.
Troubleshoot by checking the environment
| Symptom | What to check first | Next step |
|---|---|---|
| Leaves wilt soon after preparation | Dry medium, low humidity, too much leaf area, or hot direct light | Recheck moisture, move to bright indirect light, and use a loose humidity cover if the room is dry. |
| Stem base turns black or soft | Saturated medium, poor drainage, or stagnant humidity | Remove collapsing material, let excess water drain, and increase fresh-air exchange. |
| Mold appears on leaves or medium | Excess moisture and limited ventilation | Remove collapsing material, vent the cover, and avoid wetting the setup more than needed. |
| Cutting stays green but has no roots | Species, season, cutting maturity, or parent-plant condition may be slowing the response | Keep conditions steady if the stem remains firm, then reassess after more time. |
| Cutting wilts after the cover comes off | Roots may be too small for the sudden drop in humidity | Replace the cover loosely and reduce humidity in smaller steps. |
Avoid changing everything at once. Correct the clearest environmental problem, label the date, and give the cutting time to respond. Rosemary, sage, and thyme share a propagation method, but each cutting still reflects its species, parent plant, season, and growing conditions.
Run a Small Trial Before Changing Your Method
If one herb repeatedly stalls, compare two versions of the method instead of making several changes at once. Published rosemary and sage work found that season, parent source, propagation setup, and hormone treatment can change rooting outcomes. A small home trial will not reproduce a greenhouse experiment, but it can show which option works more reliably in your conditions.
- Choose one herb and collect all trial cuttings from healthy, similar growth on the same day.
- Divide them into two equal, clearly labeled groups.
- Change one factor. For example, compare a labeled consumer rooting hormone with no hormone, or compare young rosemary tips with firmer semi-ripe rosemary growth.
- Keep the medium, container size, light, cover, watering checks, and parent plant the same for both groups.
- Inspect both groups on the same schedule. Record rooted, firm but unrooted, and collapsed cuttings rather than counting green leaves as proof of rooting.
Use a short record for each batch:
| Field | What to record |
|---|---|
| Batch identity | Herb, cultivar if known, parent plant, and collection date |
| Cutting material | Young tip or firmer growth, plus whether flowers were removed |
| Treatment | Product and label-directed use, or no hormone |
| Shared conditions | Medium, container, light position, cover, and watering checks |
| Root check | Date first checked and the readiness sign you observed |
| Outcome | Started, rooted, still viable, and collapsed cuttings |
To compare batches, divide the number rooted by the number started and multiply by 100. Treat the result as a record of that batch, not a universal success rate. Repeat the comparison on another collection date before adopting a permanent rule because season and parent material can shift the response.
Frequently asked questions
Can rosemary, sage, and thyme share the same propagation tray?
Yes. Research and institutional guidance support the same broad setup for all three: vegetative tips, a porous growing medium, protected humidity, bright indirect light, and careful moisture control. Label each herb and judge readiness separately because rooting pace can differ.
Do these herb cuttings need rooting hormone?
No. Untreated rosemary, sage, and thyme tips rooted in a shared controlled trial, and institutional guidance treats hormone as optional. Other rosemary and sage experiments found that hormone could improve some outcomes, but the response changed with the material and conditions. A labeled consumer product is optional; research concentrations should not be used as a home formula.
Should I root Mediterranean herb cuttings in water?
The evidence reviewed for this guide supports rooting in a moist, porous growing medium. It does not provide enough independent full-text evidence to compare water rooting with a growing medium for rosemary, sage, and thyme, so this method stays with the better-supported option.
How long do rosemary, sage, and thyme cuttings take to root?
Expect several weeks, then check the roots rather than relying on one date. A shared trial found that sage and thyme became ready before rosemary under its conditions, while other species trials used later assessment points. Home results can shift with season, cultivar, cutting firmness, light, moisture, and humidity.
When should I pot up a rooted herb cutting?
Pot up when roots are visible or the roots hold the growing medium together. A light resistance check can help, but repeated tugging or digging can damage young roots. Lower humidity gradually after transplanting.