Growing Turmeric at Home: From a $2 Rhizome to 9-Month Harvest
A $2 grocery store rhizome is all you need. Science-backed 9-month guide to growing turmeric at home — planting, containers, optimal conditions, disease prevention, and maximizing curcumin.
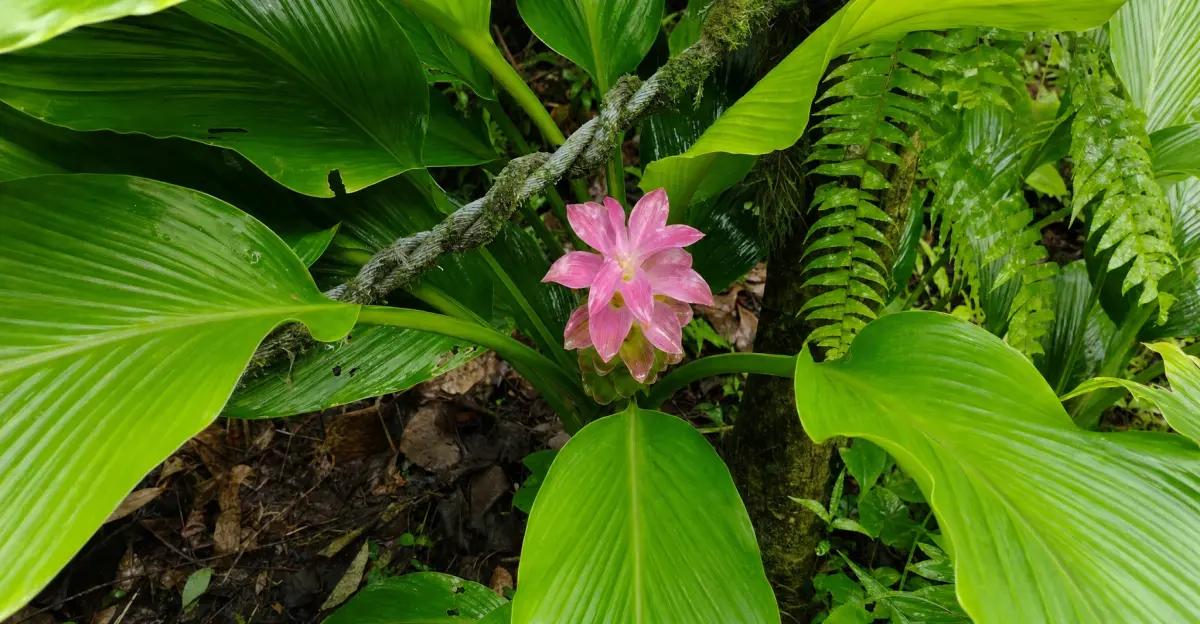
Fresh turmeric rhizomes from the supermarket cost three to five times more per gram than the dried powder — and the powder has already lost a significant portion of the volatile oils and curcuminoids that make the spice valuable. The good news: turmeric (Curcuma longa L.) is one of the most rewarding tropical plants you can grow at home. A single large container can yield over a kilogram of fresh rhizomes per season, and the plant doubles as a striking ornamental with broad paddle-shaped leaves and occasional cream-and-pink flowers.
This guide walks you through every stage, from selecting the right rhizome at the grocery store to curing and storing your harvest, backed by peer-reviewed research on cultivation, disease management, and curcumin biochemistry.
Why Grow Your Own Turmeric?
Fresh vs. Dried: A Curcumin Perspective
Commercial dried turmeric powder typically contains between 1% and 5% curcumin by dry weight, but this figure can drop considerably depending on how long the powder has been stored and how it was processed. Research on post-harvest curing methods confirms that improperly dried rhizomes lose a measurable share of curcuminoids before they ever reach a shelf (Jayashree & Zachariah, 2016).
Fresh rhizomes from your own garden bypass all of that degradation. You harvest when the plant is ready, cure the rhizomes yourself under controlled conditions, and use or store them immediately. You also get access to the fresh form — grated raw over food or juiced — which is essentially unavailable commercially outside specialty Asian grocery stores.
Cost and Self-Sufficiency
A single organic turmeric rhizome costing a dollar or two at a health-food store can, under good conditions, multiply into 500–1,000 g of fresh rhizomes within one growing season. For households that use turmeric regularly as a culinary staple or wellness supplement, the return on investment is substantial within the first year.
Turmeric also integrates naturally into a home garden already growing ginger — the two are close relatives, share near-identical growing requirements, and can be grown side by side in containers. If you have already established a ginger growing setup, adding turmeric requires almost no additional infrastructure.
Understanding Turmeric (Curcuma longa)
Botanical Background
Turmeric belongs to the family Zingiberaceae — the same family as ginger (Zingiber officinale) and galangal (Alpinia galanga). The genus Curcuma comprises roughly 130 species native to tropical and subtropical Asia, with C. longa being the primary cultivated species for rhizome production.
The plant grows as a perennial in its native tropical habitat but is typically grown as an annual in temperate climates. Above ground it produces tall, upright pseudostems — actually tightly rolled leaf sheaths — reaching 60–120 cm. The leaves are large, lanceolate, and a deep glossy green. Below ground, a network of fleshy rhizomes develops radiating outward from the mother rhizome planted in spring. These secondary "finger" rhizomes are what you harvest.
The defining pigment is curcumin (along with the related curcuminoids demethoxycurcumin and bisdemethoxycurcumin), which gives the rhizome its intense golden-orange color. Curcumin content in cultivated rhizomes typically ranges from 1.4% to 5% of dry weight and is significantly influenced by growing conditions, soil, and agroclimatic zone.
Relationship to Ginger and Galangal
Turmeric and ginger share not just a family but nearly identical cultivation requirements: both need warm temperatures, high humidity, rich well-draining soil, filtered rather than scorching direct light, and a long frost-free growing period. If you have successfully grown ginger at home, turmeric will feel immediately familiar. For a detailed look at growing the closely related ginger, see our guide on growing ginger (Zingiber officinale).
The Growth Cycle
Turmeric operates on a long calendar:
| Stage | Duration |
|---|---|
| Dormancy / pre-sprouting | 2–4 weeks |
| Shoot emergence after planting | 3–8 weeks |
| Vegetative growth (canopy establishment) | ~120 days |
| Rhizome bulking | ~60–90 days |
| Total growing season | 8–10 months |
The plant signals harvest readiness when the leaves and pseudostems naturally yellow and die back — the same cue as ginger. This dormancy signal typically occurs 8–9 months after planting in temperate indoor setups, and up to 10 months in cooler conditions.
How to Start Turmeric from Store-Bought Rhizomes
Selecting Your Starting Rhizome
The easiest and cheapest way to start turmeric is to purchase a fresh, organic rhizome from a grocery store or farmers' market. Look for:
- Firm texture — avoid anything soft, shriveled, or showing signs of rot
- Visible buds ("eyes") — small nubs or slight swellings on the surface indicate active growing points
- Organic certification — conventionally grown rhizomes are sometimes treated with sprout inhibitors that can slow or prevent germination
- Size — larger, plumper rhizomes contain more stored energy and typically establish faster
A rhizome piece as small as 2–3 cm with at least one viable bud will grow, but starting with pieces 4–6 cm long gives your plants a stronger head start.
Pre-Sprouting (Highly Recommended)
Pre-sprouting before planting dramatically improves establishment, especially in climates with shorter warm seasons:
- Place rhizome pieces in a shallow tray lined with moistened coco coir or peat moss.
- Cover loosely with plastic wrap or a humidity dome to maintain moisture.
- Keep in a warm location — 25–30°C (77–86°F) is optimal for germination.
- Check daily; sprouts typically appear in 1–3 weeks.
- Once shoots reach 2–4 cm, the pieces are ready to pot.
University of Vermont Extension recommends this technique for getting turmeric established in northern climates with shorter growing windows, as it effectively adds several weeks to the usable season (UVM Extension).
Planting Depth, Spacing, and Container Selection
- Planting depth: 5–7 cm (2–3 inches) below the soil surface, buds facing upward
- Spacing: If planting multiple rhizomes in one large container, allow 15–20 cm between pieces
- Container size: A minimum of 30 cm deep and 45 cm wide (12" × 18") per plant is needed for good yields. Larger is better — one study found container size significantly influenced final rhizome weight, with larger containers producing dramatically higher yields per plant. A 15–20 gallon pot per rhizome is not excessive for a serious harvest.
- Drainage: Drainage holes are non-negotiable. Turmeric is highly susceptible to rhizome rot in waterlogged conditions.
Optimal Growing Conditions
Temperature
Turmeric is a true tropical plant. It germinates best between 25–30°C (77–86°F) and grows most vigorously at 26–32°C (79–90°F), with an optimal growth temperature around 28°C (82°F). Research by Chintakovid et al. (2022) confirmed that temperatures below optimal significantly reduce both rhizome fresh weight and curcuminoid accumulation — plants subjected to suboptimal temperatures produced rhizomes up to 30–50% lighter than those grown under ideal warm conditions.
For temperate growers:
- Start indoors in early spring, well before last frost
- Move outdoors only when nighttime temperatures consistently exceed 18°C (65°F)
- Bring containers back indoors when temperatures drop below 15°C (59°F) in autumn
- Maintain indoor temperatures above 20°C (68°F) throughout the growing season
Light
Turmeric is frequently described as a "shade-loving" plant, but the science is more nuanced. Research conducted in Okinawa, Japan found that 59–73% relative light intensity (RLI) — equivalent to bright filtered or dappled light rather than full midday sun — produced the highest rhizome yield and curcumin content. At 100% full sun, both yield and curcumin content declined.
For home growers, this translates to:
- Outdoors: A spot with morning sun and afternoon shade, or light filtered through an overhead canopy
- Indoors: A bright south- or east-facing window, or LED grow lights at moderate intensity
Our validated plant data puts the ideal DLI at 18 mol/m²/day with a 14-hour photoperiod and a light intensity of around 400 µmol/m²/s — achievable with a quality full-spectrum LED panel. For a detailed explanation of DLI and grow light spectra, see our LED grow light spectrum guide.
Humidity
Turmeric evolved in humid tropical environments and performs best at 70–90% relative humidity, with 80% being the optimal value. In practice, indoor growing environments during winter heating season often drop below 40–50% RH, which can stress the plants and slow rhizome development.
Practical strategies to raise humidity around container turmeric:
- Cluster plants together (plants transpire and raise local humidity)
- Place containers on a pebble tray filled with water (ensure the pot bottom is above the waterline)
- Use a small ultrasonic humidifier in the growing area
- Grow in a greenhouse, sunroom, or enclosed porch where humidity naturally accumulates
Soil and pH
Turmeric thrives in rich, loamy, well-draining soil with a slightly acidic pH of 5.5–6.0 — this range maximizes the availability of phosphorus, potassium, iron, and manganese, all nutrients critical to turmeric's growth and curcumin synthesis.
A good container mix:
- 50% quality potting mix (loam-based)
- 30% aged compost or worm castings
- 20% perlite or coarse sand for drainage
Avoid heavy clay soils or mixes that compact and retain water. Turmeric's rhizomes need room to expand and must never sit in standing water.
Growing Turmeric in Containers (Indoor Method)
Why Containers Work Well
Despite turmeric's tropical origins, container growing is well-suited to the plant's biology. Pots allow you to:
- Control soil composition precisely
- Move plants between indoor and outdoor environments as temperatures shift
- Optimize individual plant conditions (watering, fertilization, humidity)
- Harvest by tipping out the entire pot without disturbing adjacent plants
The University of Georgia Cooperative Extension recommends containers as the primary method for home growers in non-tropical climates, noting that turmeric adapts well to pot culture provided the container is large enough and temperatures remain warm.
Container Size Matters More Than You Might Expect
Container volume directly constrains rhizome development. The minimum recommended size is 12 inches deep and 18 inches wide per planting, but if you want a meaningful harvest, aim for 15–20 gallon containers (roughly 57–75 liters). Fabric grow bags in this range work extremely well — they provide superior aeration compared to plastic pots and prevent root circling.
Indoor Lighting Strategy
For year-round indoor growing without outdoor access, supplemental lighting is essential through autumn and winter. Turmeric responds well to full-spectrum LED grow lights. Key parameters:
- Spectrum: Full spectrum with emphasis on the 450–490 nm (blue) and 630–660 nm (red) ranges
- Duration: 14 hours on / 10 hours off
- Intensity: Position lights to deliver approximately 400 µmol/m²/s at canopy level
Note that turmeric does not require intense light — it is actually harmed by it. A grow light set too close or too bright can bleach leaves and reduce rhizome yield, mirroring the findings of Hossain et al. (2009) at 100% RLI. Maintain a conservative distance from the canopy and monitor leaf color. Healthy turmeric leaves should be a rich, deep green.
Winter Growing for Temperate Climates
In USDA hardiness zones below Zone 8, turmeric cannot survive outdoors year-round. A practical indoor winter strategy:
- In autumn, when outdoor temperatures begin dropping below 15°C, bring pots inside before the first frost.
- Allow the plant to naturally enter dormancy as daylength shortens — leaves will yellow and die back.
- At this point you can either harvest the rhizomes or store the entire pot in a cool (10–15°C), dark space through winter.
- In late winter/early spring, warm the pot back up, increase watering, and re-introduce light to break dormancy.
- Replant fresh rhizomes from your harvest to start the next season.
Watering, Feeding, and Care
Watering
Consistent soil moisture is critical during the vegetative growth and rhizome bulking phases. The soil should feel moist like a wrung-out sponge — never bone dry, never waterlogged. Practical guidelines:
- Water deeply when the top 2–3 cm of soil is dry
- Ensure every watering event results in water flowing freely from drainage holes, flushing the root zone
- Reduce watering significantly once leaves begin to yellow and die back at season end — the plant is entering dormancy and excess moisture at this stage is a primary driver of rhizome rot
During the active growing season in summer, containers may need watering every 2–3 days depending on pot size, ambient temperature, and humidity. Check soil moisture manually rather than following a fixed schedule.
Fertilization
Turmeric is a moderately heavy feeder, with potassium being the most critical macronutrient during rhizome bulking. Agroclimatic research by Sasikumar et al. (2016) identified nitrogen, phosphorus, and potassium as the key determinants of rhizome essential oil and yield, confirming the plant's heavy-feeder profile. Our validated plant data records an NPK ratio of 200-50-200 — notably high in both nitrogen and potassium, with moderate phosphorus — confirming this potassium-intensive requirement during the bulking phase.
A practical feeding approach:
- Vegetative phase (months 1–4): A balanced, slow-release organic fertilizer worked into the potting mix at planting, supplemented with a dilute liquid feed (fish emulsion or seaweed extract) every 2–3 weeks
- Rhizome bulking phase (months 5–8): Shift toward a potassium-rich fertilizer to support underground rhizome development
- Late season: Cease fertilization as leaves begin to yellow
For detailed NPK targets and EC/pH management, refer to the turmeric plant page.
Detailed Nutrient Schedule by Growth Stage
The following month-by-month feeding table synthesizes Sasikumar et al. (2016) zone-specific NPK requirements with validated per-stage nutrient data. All EC values assume a base water EC of 0.3–0.5 mS/cm; adjust targets downward if your tap water EC is higher.
| Growth Stage | Months | N Target (ppm) | P Target (ppm) | K Target (ppm) | EC Target (mS/cm) | pH Target | Notes |
|---|---|---|---|---|---|---|---|
| Pre-sprouting / Dormancy | 0 | — | — | — | — | — | No feeding; rhizome uses stored reserves |
| Sprouting / Early establishment | 1–2 | 50–100 (opt. 75) | 20–40 (opt. 30) | 50–100 (opt. 75) | 0.8–1.2 | 5.8–6.0 | Light feeding; roots are shallow; avoid salt stress |
| Vegetative (canopy building) | 3–5 | 150–250 (opt. 200) | 40–60 (opt. 50) | 150–250 (opt. 200) | 1.4–2.0 | 5.6–6.0 | Nitrogen drives canopy; increase gradually |
| Rhizome initiation | 6 | 125–175 | 50–70 | 175–225 | 1.6–2.2 | 5.5–5.8 | Transition: begin shifting K:N ratio toward K dominance |
| Rhizome bulking | 7–8 | 100–150 (opt. 125) | 60–80 (opt. 70) | 200–300 (opt. 250) | 1.8–2.4 | 5.5–5.8 | Potassium critical for starch and curcumin deposition |
| Senescence / Pre-harvest | 9–10 | Cease | Cease | Cease | — | — | No fertilizer; allow plant to consume reserves |
Interpreting the Table for Container Soil Growing
Container growers using potting mix cannot directly measure solution EC or ppm values without a bluelab-style meter. Use these conversion rules of thumb:
- Seedling/sprouting stage: A single application of slow-release organic fertilizer at half the bag-recommended rate is sufficient. Supplement with dilute seaweed extract (2 ml/L) every 3 weeks.
- Vegetative stage: Move to full recommended slow-release rate, plus a monthly liquid feed of balanced NPK (e.g., 10-10-10 at half-strength) and every-2-week seaweed supplement.
- Bulking stage: Switch liquid feeds to a potassium-dominant formulation (e.g., tomato feed with NPK ratios around 4-5-8 or higher K). Aim for a K:N ratio of approximately 2:1 at this stage, consistent with the 200 K : 125 N optimum in validated data.
- Phosphorus note: Maintain phosphorus at the moderate levels shown in the table throughout. Excess P above ~80 ppm can compete with iron and zinc uptake, exacerbating any pH-related micronutrient lockout.
Organic vs. Synthetic Nutrition
Turmeric responds well to organic nutrition — partially because organic feeds release nutrients slowly, matching the plant's gradual demand curve, and partially because organic matter in the root zone supports the beneficial microbial populations (including Trichoderma spp.) that protect against Pythium. If using synthetic feeds, consider adding a monthly 5 ml/L application of soluble humic acid to maintain microbial activity in the potting mix.
Common Care Issues
Yellowing leaves mid-season: Can indicate overwatering, poor drainage, iron deficiency (especially if pH is too high — above 6.5 locks out iron), or potassium deficiency during bulking. Check soil pH first; pH creep above 6.5 is common in containers over time. Amend with dilute sulfuric acid solution or acidic organic matter such as pine bark.
Slow or no emergence: If rhizomes fail to sprout after 6–8 weeks in warm conditions, the planting material may have been treated with a sprout inhibitor. This is why organic rhizomes are strongly preferred. Gently excavate to check for signs of rot.
Stunted growth or pale canopy: Often a sign of insufficient light or low temperatures. Move to a brighter, warmer position and verify that nighttime temperatures are not dropping below 18°C.
Leaf scorch: Caused by excessive direct sun or low humidity. Move to a position with filtered light and increase ambient moisture.
Harvesting and Curing
When to Harvest
The most reliable harvest signal is natural senescence: the leaves yellow, the pseudostems soften and collapse, and the plant visibly enters dormancy. This typically occurs 8–10 months after planting. Do not harvest early — the final weeks of the growing season, when the above-ground canopy is senescing, are when the plant mobilizes carbohydrates and secondary metabolites into the rhizomes, maximizing both yield and curcumin content.
Research on harvest timing confirms that the biochemical and physical properties of turmeric rhizomes change significantly based on maturity at harvest — late harvest consistently produces higher curcumin concentrations and better oleoresin content.
How to Harvest
- Stop watering the plant 2–3 weeks before intended harvest to allow the soil to dry slightly — this firms up the rhizomes and reduces surface moisture that can encourage rot during storage.
- Tip the entire container on its side and gently break apart the root ball by hand or with a garden fork.
- Separate the "mother" rhizome (the original piece you planted, now depleted) from the new "daughter" or "finger" rhizomes that developed around it.
- Brush off excess soil — do not wash if you intend to cure and store; washing introduces moisture.
- Set aside the most vigorous fingers to replant next season. Store the rest.
A well-grown plant in a 15-gallon container can yield 500–1,000 g of fresh rhizomes.
Curing for Storage
Curing is the traditional post-harvest treatment that gelatinizes starch, develops the characteristic aroma, and intensifies the golden color. Research by Jayashree & Zachariah (2016) identifies steam cooking followed by sun drying as one of the most effective methods for maximizing curcumin retention.
For home curing:
- Cook: Boil or steam clean rhizomes in water for 30–45 minutes, until a fork passes through with moderate resistance and a white froth appears on the water surface.
- Dry: Spread cooked rhizomes in a single layer on a rack or mesh tray in a warm, well-ventilated area. Sun drying (direct sunlight outdoors) achieves good results in 7–14 days. Alternatively, dry in an oven or dehydrator at 50–60°C until completely brittle.
- Polish (optional): Traditionally, dried rhizomes are tumbled or rubbed to smooth the surface and bring out the color.
- Store: Whole dried cured rhizomes keep for 6–12 months in an airtight container away from light and heat.
For fresh use: Unwashed, uncured rhizomes can be refrigerated in a paper bag for 2–4 weeks, or frozen whole for up to 6 months with negligible quality loss.
The Science of Curcumin
What Makes Turmeric Medicinally Valuable
The bioactive compounds in Curcuma longa rhizomes are collectively called curcuminoids, with curcumin (diferuloylmethane) accounting for approximately 75–80% of total curcuminoid content. Demethoxycurcumin and bisdemethoxycurcumin make up the remainder. These polyphenolic compounds have been the subject of thousands of published studies examining anti-inflammatory, antioxidant, and neuroprotective properties.
Curcumin is notably hydrophobic and has low bioavailability when consumed alone — co-consumption with piperine (found in black pepper), which inhibits curcumin glucuronidation, increases absorption by up to 2,000% in human studies. Fat-based preparations (golden milk, curry cooked in oil) also significantly improve uptake.
How Growing Conditions Affect Curcumin Content
Growing environment exerts measurable influence on curcumin concentration in the harvested rhizome:
- Light: The Okinawa study by Hossain et al. (2009) demonstrated that curcumin content was highest in plants grown at 59–73% RLI (moderate shade), not at full sun. This counterintuitive finding suggests curcumin may function partly as a UV-screening pigment, accumulating more strongly under partial shade conditions that trigger compensatory pigmentation responses.
- Temperature and water: Chintakovid et al. (2022) found that water deficit at elevated temperatures reduced curcuminoid content by approximately 40% relative to well-watered, optimally-temperatured controls. Consistent moisture and warm temperatures are therefore essential for high-curcumin harvests.
- Agroclimatic factors: Sasikumar et al. (2016) profiling cultivars across multiple Indian agroclimatic zones confirmed that altitude, soil pH, and temperature are the most sensitive determinants of curcumin percentage, with the same variety yielding 1.4–5% curcumin depending on where it was grown.
- Post-harvest processing: Boiling or steaming before drying is not merely traditional — it activates enzymatic processes that fix curcuminoids in the rhizome tissue. Sun-dried whole boiled rhizomes produce the highest curcumin content in dried powder; Jayashree & Zachariah (2016) reported up to 5.91% curcumin with 40-minute water boiling and up to 6.0% with 30-minute steam curing in controlled trials.
Note: Jayashree & Zachariah (2016) found that increasing curing time beyond the optimum significantly reduces curcumin content. Maximum curcumin retention was achieved at 40 minutes for water boiling and 30 minutes for steam cooking. The 30–45 minute range cited in the curing instructions above is a practical home guide; for maximum curcumin retention, aim for the lower end of the range for steam (30 min) and approximately 40 minutes for water boiling.
For the home grower, the practical takeaway is clear: provide consistent warmth and moisture, avoid full direct sun, and cure rhizomes properly before drying. These three steps collectively maximize the curcumin density of your final product.
Maximizing Curcumin Content: Advanced Growing Strategies
For growers interested in optimizing their harvest beyond baseline best practices, the following strategies provide measurable improvements to curcumin density based on peer-reviewed research.
Light Management: Dialing In the 59–73% RLI Window
The Hossain et al. (2009) study that established the 59–73% RLI optimum used neutral shade cloth to precisely modulate light transmission. Home growers can replicate this:
- Outdoors: 40–50% shade cloth (available at garden centers) suspended above containers places plants squarely in the optimal RLI window on most sunny days. Avoid black shade cloth — white or aluminet fabric reflects heat as well as blocking light.
- Indoors with LED: Set grow light intensity to deliver 350–450 µmol/m²/s at canopy level. This equates to roughly 40–60% of the maximum output of most full-spectrum horticulture panels, which typically achieve 800–1,000 µmol/m²/s at close range.
- Monitor leaf color as a proxy: Deep, glossy green leaves indicate the plant is in the appropriate light range. Yellowing or bleaching of leaf surfaces suggests excess light; pale, lime-green coloration with elongated internodes suggests insufficient light.
Temperature Optimization for Secondary Metabolite Accumulation
Chintakovid et al. (2022) established that temperatures deviating from the 26–32°C optimum suppress curcuminoid synthesis. The effect is asymmetric: heat stress above 38°C reduces curcumin even more severely than cold stress, as high temperatures accelerate curcumin degradation via oxidative pathways. The practical protocol:
- Maintain daytime canopy temperatures at 28–30°C during the rhizome bulking phase (months 5–8).
- Allow a moderate nighttime drop to 22–24°C — a 6–8°C differential (DIF) supports secondary metabolite accumulation without cold stress.
- Avoid placing containers near heating vents or in direct contact with surfaces that may exceed 35°C.
- During heat waves, move containers to a cooler, shaded position indoors to prevent temperature-induced curcumin loss.
Controlled Water Stress in the Final 4–6 Weeks
Counterintuitively, mild water stress applied strategically during the final 4–6 weeks of the growing season (as the canopy begins senescing) can enhance curcuminoid concentration by triggering stress-response secondary metabolism. Chintakovid et al. (2022) found elevated curcumin in mildly water-stressed plants compared to continuously well-watered controls — provided the stress was mild and late-season, not severe or chronic.
Protocol:
- Once 50–60% of leaves have yellowed and the plant is clearly entering senescence, reduce irrigation frequency by half.
- Allow the top 5 cm of soil to dry completely between waterings.
- Do not withhold water entirely — the goal is mild deficit, not desiccation. Monitor for wilting; if the remaining green leaves show pronounced afternoon wilting, water immediately.
- Continue until harvest, at which point normal pre-harvest dry-down applies (stop watering 2–3 weeks before digging).
Variety Selection by Curcumin Profile
Not all grocery-store turmeric rhizomes are equal. Commercial production centers in India, Indonesia, and Thailand have developed cultivars with substantially different curcumin profiles. Sasikumar et al. (2016) documented curcumin ranges from 1.4% to over 5% across cultivars grown in the same environment — a 3.5× difference attributable entirely to genetics.
| Cultivar Type | Origin | Typical Curcumin Range | Notes |
|---|---|---|---|
| "Madras" types (BSR-1, Alleppey) | South India | 3.0–5.5% | Commercial standard; strongly orange-yellow |
| "Erode" types | Tamil Nadu, India | 2.5–4.5% | High oleoresin content alongside curcumin |
| Indonesian types | Java/Sumatra | 1.4–2.5% | Milder flavor; lower curcumin |
| Wild/generic supermarket | Mixed origin | 1.5–3.0% | Variable; acceptable for home growing |
When purchasing rhizomes, source from Indian or South Asian grocery stores and look for deeply pigmented, intensely orange-yellow flesh when cut. This visual inspection correlates reasonably well with higher curcumin content.
Post-Harvest Curing for Maximum Curcumin Retention
Jayashree & Zachariah (2016) identified the precise time-temperature curves that maximize curcumin retention during curing:
| Curing Method | Optimal Duration | Resulting Curcumin (% dry weight) |
|---|---|---|
| Water boiling (100°C) | 40 minutes | Up to 5.91% |
| Steam curing | 30 minutes | Up to 6.0% |
| Sun drying (uncured) | — | 1.4–2.8% |
The enzyme deactivation achieved by brief heat treatment "locks in" curcuminoids that would otherwise be degraded during drying by endogenous oxidases. Steam curing at 30 minutes slightly outperforms water boiling, likely because steam penetrates the rhizome more uniformly without leaching water-soluble curcuminoids into the cooking medium.
After curing, dry at the lowest effective temperature — sun drying (40–50°C ambient) preserves more volatiles than oven drying at 60–70°C. Target a final moisture content below 10% for shelf-stable powder (rhizomes should be completely brittle with no flex when snapped).
Disease and Pest Management
Rhizome Rot (Pythium aphanidermatum)
The most economically significant disease of turmeric worldwide, rhizome rot caused by the oomycete pathogen Pythium aphanidermatum can devastate a planting rapidly under warm, wet conditions. Anusuya & Sathiyabama (2014) demonstrated that chitosan foliar spray significantly increases plant defense enzyme activity (chitinases, chitosanases), reducing rhizome rot incidence in treated plants compared to untreated controls.
Prevention strategies for container growers:
- Always use fresh, sterile potting mix — never garden soil, which may harbor Pythium spores
- Ensure drainage is completely unobstructed
- Avoid overhead watering onto foliage and rhizome crowns; water at soil level
- Do not let containers sit in water-filled saucers for extended periods
- If Pythium is suspected (water-soaked, collapsing pseudostems; blackened, slimy rhizomes at the crown), act immediately: remove the plant, trim infected rhizome tissue back to clean white flesh, dust cuts with sulfur powder, allow to dry briefly, and repot in fresh sterile mix
Leaf Blotch and Leaf Spot
Two foliar diseases are common in humid conditions:
- Leaf blotch (Taphrina maculans): Brown, water-soaked lesions with yellow halos, usually appearing in the second half of the growing season
- Leaf spot (Colletotrichum capsici): Oval brown lesions with white centers; can cause defoliation and has been documented to reduce rhizome yield by up to 62.5% in severe field outbreaks
For home growers, both diseases are manageable through:
- Improving air circulation around plants (avoid overcrowding)
- Watering at the base, not overhead
- Removing and disposing of severely affected leaves promptly
- Applying copper-based or neem oil-based fungicidal sprays at the first sign of symptoms
Iron Deficiency Chlorosis
Interveinal yellowing on new leaves — the classic sign of iron deficiency — is particularly common in turmeric when soil pH creeps above 6.5. At higher pH, iron becomes chemically locked into insoluble forms the roots cannot absorb. Test soil pH seasonally and amend with an acidifying agent if needed to maintain the 5.5–6.0 target range.
Advanced Disease Management Protocol
For growers dealing with persistent disease pressure or managing multiple containers, an integrated pest management (IPM) approach reduces reliance on chemical interventions and builds long-term crop resilience.
Biological Control: First Line of Defense
Trichoderma harzianum and T. viride are naturally occurring soil fungi that antagonize Pythium aphanidermatum, the primary rhizome rot pathogen, through a combination of mycoparasitism, antibiosis, and competitive exclusion. Chavan et al. (2017) demonstrated significant reduction in Pythium incidence in field plots treated with Trichoderma-based biocontrol agents, with rhizome rot incidence dropping from over 30% in untreated controls to under 8% in Trichoderma-treated plots.
Application protocol:
- At planting, mix Trichoderma powder (minimum 2 × 10⁸ CFU/g) into the bottom third of the potting mix at 10 g per 15-litre container.
- Apply a drench of Trichoderma liquid suspension (5 g/L water) at 250 ml per container at week 4, week 8, and week 16.
- Do not apply on the same day as chemical fungicides — maintain a minimum 48-hour gap between Trichoderma applications and any copper- or sulfur-based products.
Bacillus subtilis (commercial products include Serenade, RootShield) provides complementary protection against foliar fungal diseases including Colletotrichum capsici leaf spot. It can be applied as a foliar spray every 2 weeks from month 3 onward as a preventive measure. Unlike contact fungicides, B. subtilis colonizes leaf surfaces and provides persistent protection for 7–14 days per application.
Hot Water Seed Treatment for Rhizome Sanitation
Chavan et al. (2017) confirmed that hot water treatment of seed rhizomes before planting dramatically reduces the Pythium inoculum load carried on the rhizome surface — a critical source of infection that is otherwise transferred directly into the potting medium:
Protocol:
- Fill a container with water pre-heated to exactly 50°C (use a kitchen thermometer — precision matters here; 48°C is ineffective, 52°C causes rhizome tissue damage).
- Submerge clean seed rhizomes for 30 minutes, maintaining temperature within ±1°C by topping up with hot water as needed.
- Remove rhizomes and allow to air-dry at room temperature for 24–48 hours before planting.
- Optionally, dust dried rhizomes with Trichoderma powder immediately before planting to inoculate the treatment sites.
This treatment eliminates surface Pythium propagules without damaging viable buds, provided temperature and duration are controlled accurately.
Monitoring Schedule
| Week | Action | What to Look For |
|---|---|---|
| Weekly (months 1–3) | Visual inspection of pseudostem bases | Soft, water-soaked tissue at soil level = early Pythium; act immediately |
| Bi-weekly (months 4–8) | Foliar inspection | Brown lesions (leaf blotch / leaf spot); early treatment prevents spread |
| Monthly | Soil pH test | pH above 6.5 → apply acidifying amendment; pH below 5.0 → apply lime |
| Monthly | Drainage check | Ensure water flows freely from drainage holes within 30 seconds of irrigation |
| At senescence onset | Reduce watering | Critically important: excess moisture during dormancy is the #1 driver of rot |
Chemical Intervention Thresholds
Reserve chemical fungicides for situations where biological and cultural controls have failed. Intervene chemically when:
- Pythium: More than one pseudostem per container shows water-soaking symptoms, or any visible rhizome blackening is detected. Use metalaxyl-M (mefenoxam) drench at label rate — this systemic oomycicide is specifically effective against Pythium. Remove and discard severely rotted rhizomes before treatment.
- Leaf blotch/leaf spot: More than 20% of leaf area on more than 50% of leaves shows lesion coverage. Apply copper hydroxide (e.g., Kocide) or chlorothalonil at label rate. Repeat every 7–10 days until lesion spread stops.
- Resistance management: Do not use the same chemical class more than twice consecutively. Alternate between copper-based products, strobilurins, and triazoles for foliar diseases.
Chitosan foliar spray (1–2 g/L) applied every 2 weeks throughout the growing season provides an effective low-cost supplement to biological controls — Anusuya & Sathiyabama (2014) demonstrated statistically significant increases in defense enzyme activity (chitinase, β-1,3-glucanase) in chitosan-treated plants, reducing Pythium incidence without any adverse effects on plant growth or yield.
Turmeric and Hydroponics: What You Should Know
Turmeric's rhizome-based growth architecture makes it challenging in most hydroponic systems. The bulky underground rhizomes require structural support, and the susceptibility to Pythium and related oomycete pathogens is significantly heightened in warm, nutrient-rich recirculating water environments.
Our validated system compatibility assessment classifies turmeric as:
- Suitable: Ebb-and-flow (flood and drain) and drip systems with soilless media such as coco coir
- Not suitable: Deep Water Culture (DWC), Nutrient Film Technique (NFT), or Kratky passive hydroponics
In coco coir-based ebb-and-flow systems, rhizomes are fully supported in the medium, flooding intervals can be controlled to prevent waterlogging, and the coco coir's natural Trichoderma populations provide some biological suppression of Pythium. If you are interested in controlled-environment growing, this is the recommended path.
Frequently Asked Questions
Can I grow turmeric in cold climates?
Yes, but only as an indoor/container plant or annual. Turmeric rhizomes are killed by frost, and the plant requires a minimum growing season of 8 months at warm temperatures to produce a harvestable yield. In climates with short summers, start rhizomes indoors in late winter (February/March in the northern hemisphere), provide supplemental heat and lighting, and move containers outdoors only after all frost risk has passed. Bring them back in well before first autumn frost. Many growers in northern Europe, Canada, and the northern United States successfully harvest turmeric annually using this approach.
How much turmeric does one plant produce?
Yield varies considerably with container size, soil quality, and growing conditions. In small 2-gallon containers, expect roughly 300–500 g of fresh rhizomes. In larger 15–20 gallon containers with rich soil and optimal conditions, a single planting can yield 700–1,200 g. Each 100 g of fresh turmeric rhizome yields approximately 20–25 g of dried powder after curing.
Is turmeric easy to grow for beginners?
Turmeric is classified as intermediate difficulty — easier than many tropical plants, but requiring consistent warmth and humidity that beginners in temperate climates may need to actively manage. If you can maintain indoor temperatures above 20°C (68°F) and provide a bright filtered-light position or grow lamp, the plant itself is forgiving on watering (it tells you clearly when it is struggling) and largely pest-free in container culture. The main challenge is the long growing season: 8–10 months requires sustained commitment.
Can I use grocery-store turmeric powder to grow plants?
No. Dried powder is processed from cured rhizomes and contains no viable plant material. You need fresh rhizomes — the knobbly orange-gold pieces sold in the produce section. These are the same botanical material as what nurseries sell as "turmeric seed rhizomes," typically at a much higher price.
Does turmeric flower indoors?
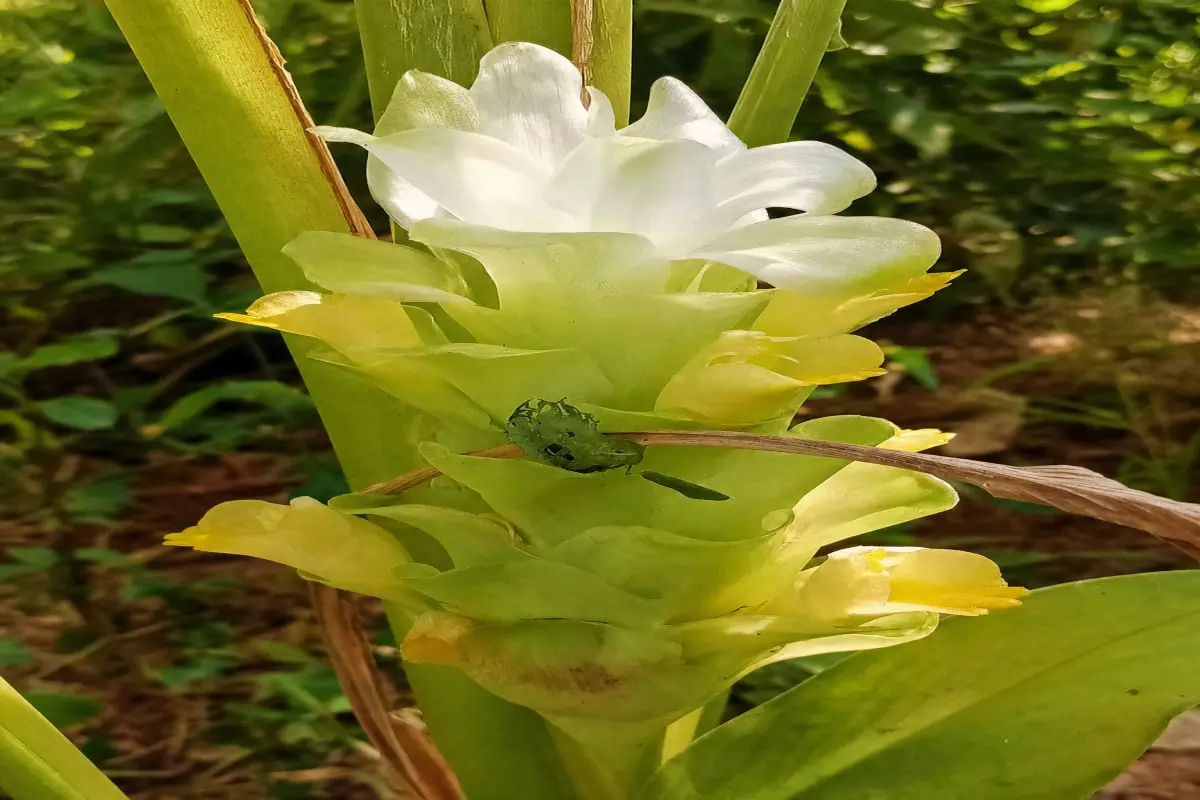
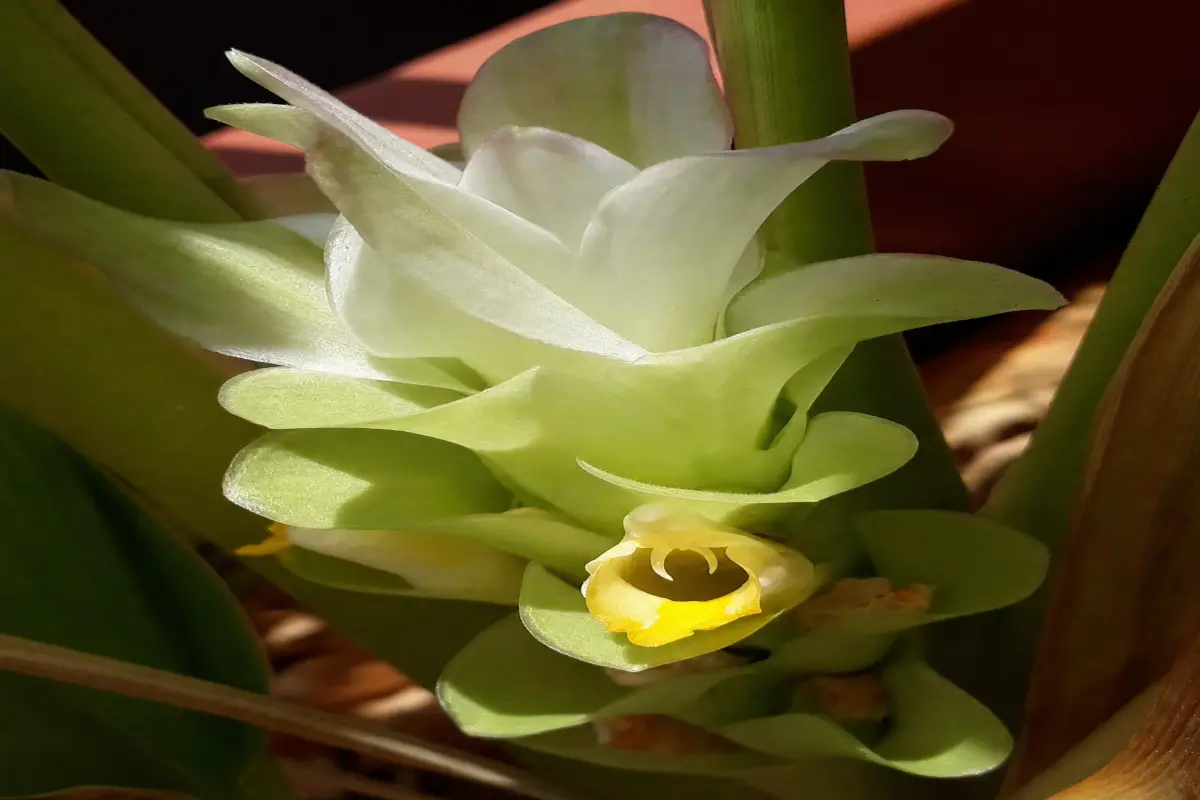
Occasionally, yes. Mature plants in their second growing season, or those given especially favorable conditions, may produce the distinctive cream, white, and pink inflorescences that emerge from the base of the pseudostem. Flowering does not significantly reduce rhizome yield in container plants and can be left in place. The flowers are edible and mildly fragrant.
How does turmeric compare to ginger as a home crop?
The two are nearly identical in cultivation requirements, making them natural companions. Turmeric requires a slightly longer growing season (8–10 months versus 8–10 months for ginger, with similar timing) and slightly higher temperatures for peak performance. Both are equally rewarding in terms of fresh-to-dried value ratio. Many home gardeners grow both in adjacent containers and harvest around the same time in late autumn.
Scaling Turmeric Production: From Home to Market Garden
For growers ready to move beyond a few containers toward a more systematic operation — supplying a CSA share, farmers' market stall, or small-scale processing business — the following scaling framework provides the key calculations and infrastructure considerations.
Rhizome Multiplication Rates and Seed Stock Planning
Turmeric has a predictable rhizome multiplication ratio: each seed rhizome piece (30–50 g) planted under good conditions produces a clump weighing 500–1,200 g of fresh rhizomes at harvest — a multiplication factor of roughly 10–25× by weight. However, approximately 20–30% of the harvest should be reserved as seed stock for the next season. Practical planning figures:
| Scale | Containers Needed | Seed Stock Required | Expected Fresh Yield | Dried Powder Yield |
|---|---|---|---|---|
| Home (personal use) | 3–5 × 15-gal | 150–250 g | 2.5–5 kg fresh | 500 g – 1.25 kg |
| Small market (10 kg dried/yr) | 30–40 × 15-gal | 1.5–2 kg | 40–60 kg fresh | 8–15 kg |
| Market garden (50 kg dried/yr) | 150–200 × 15-gal, or 20–30 m² raised beds | 8–10 kg | 200–300 kg fresh | 40–75 kg |
To build seed stock from scratch over two seasons:
- Year 1: Plant 10 rhizome pieces; reserve 80% of harvest as seed, use 20% fresh.
- Year 2: Plant 80–100 pieces; by harvest you have sufficient stock for market-scale production.
Container-to-Raised-Bed Transition
Moving from containers to in-ground raised beds reduces per-unit cost significantly but introduces soil-borne disease risk that container growing avoids. Key considerations:
- Bed preparation: Incorporate 15–20 cm of compost into the top 30 cm of soil. Turmeric is most productive in loose, amended beds — heavy clay must be broken up with grit and organic matter.
- Raised bed dimensions: 1.2 m wide (comfortable reach from both sides) × any practical length. Plant rows 30 cm apart with 25 cm between plants within rows.
- Disease transition risk: The first year in any new bed carries elevated Pythium risk. Apply Trichoderma at bed preparation and conduct hot water seed treatment on all planting material.
- Irrigation: Drip irrigation on a timer eliminates overhead moisture that encourages foliar disease, and allows precise moisture management during the critical late-season dry-down.
Yield comparison: well-managed raised beds typically achieve 2–3 kg/m² of fresh rhizomes under favorable conditions. A 20 m² bed can produce 40–60 kg fresh per season, yielding 8–15 kg dried powder.
Processing Equipment
At market scale, manual processing becomes the bottleneck. Equipment worth investing in once you exceed 20 kg of fresh rhizomes per season:
| Process Step | Home-Scale Tool | Market-Scale Tool | Notes |
|---|---|---|---|
| Washing | Bucket and hand brush | Barrel tumble washer | Mechanical washing is acceptable post-curing if rhizomes are dried immediately |
| Curing / boiling | Stock pot (≤5 kg batches) | Commercial steam cooker or blancher | Steam curing preferred for consistent curcumin retention |
| Drying | Oven or food dehydrator | Solar tunnel dryer or commercial dehydrator | Target <10% moisture; use hygrometer to verify |
| Polishing | Hand rubbing in sack | Drum polisher | Cosmetic; increases product value at markets |
| Grinding | High-speed blender | Hammer mill or spice grinder (commercial) | Grind only as needed to preserve volatile oils |
Yield Economics
At current UK/US specialty market prices for fresh organic turmeric (~£8–12/kg fresh; ~£25–40/kg dried powder), even a small raised-bed operation can generate meaningful returns:
- 20 m² bed, 40 kg fresh yield: At £10/kg fresh = £400 gross; processing costs (time, fuel) ~£50; net ~£350 per season.
- 20 m² bed, 10 kg dried powder: At £30/kg dried = £300 gross; processing costs ~£80; net ~£220 per season.
- Fresh sales typically generate higher gross revenue but require refrigerated distribution. Dried powder commands premium pricing and has 12-month shelf stability.
The break-even point for a small market-garden setup (raised beds, irrigation, processing equipment) is typically reached by the third season, after which seed costs are zero (self-supplied) and production costs are primarily labor and growing media top-up.
Getting Started: A Quick-Reference Summary
| Parameter | Target |
|---|---|
| Container size | 15–20 gallon (57–75 L), minimum 30 cm deep |
| Soil pH | 5.5–6.0 |
| Temperature | 26–32°C (79–90°F) growing; min 20°C (68°F) |
| Humidity | 70–90% RH |
| Light | 14 h photoperiod; 59–73% RLI (filtered sun or moderate LED) |
| Watering | Keep moist; never waterlogged |
| Harvest signal | Leaves yellow and die back naturally |
| Growing season | 8–10 months |
The greatest single predictor of a successful turmeric harvest is simply temperature. Keep your plant warm, maintain consistent moisture, provide filtered rather than scorching light, and a golden harvest eight to ten months later is close to guaranteed.
For your next tropical rhizome crop, explore our ginger growing guide — the two plants are natural growing companions that share nearly every requirement and can be cultivated side by side in any home garden or indoor setup.